Run 7 → Invite Users & Set Roles
Introduction
It's time to build out your personal version of Thunderhawk Arena. To create this space, we'll add to your powers — making you the Thunder Hawk Arena Admin.
And we'll start by staffing the venue with Role-based users.
- You'll be able to interact with your new venue using your Mobile devices
- But for now, put the Tablet on the table as we start with a clean slate — literally!

- Read the latest in this Run 7 article →
- About Users & Roles (7 min)
- If you need to practice
- Work through the 'Try it!' checklists in your Sandbox (Thunderhawk Arena)
Try it!
→ on Event Computers
A. Start by reading → Run 7 About Users & Roles (7 min)
B. Then return here and give this Hands-on Checklist a go
Hands-on Checklist
- Log into Guard IQ on your Event Computer → Hint ✋
- Open Thunderhawk Arena organization → Hint ✋
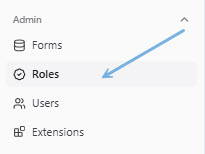
- Click Roles from the Admin menu
-
Start by Adding the following Roles → Hint ✋
-
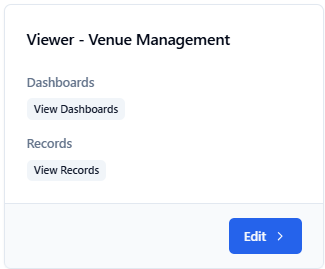
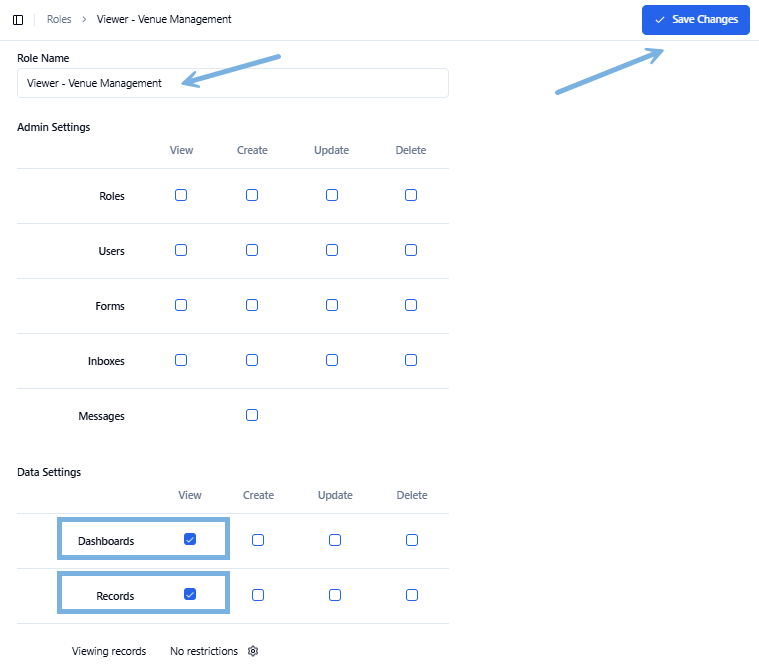
Name the first Role → Viewer - Venue Management
- Permissions →
- Dashboards: View
- Records: View
- Save Changes
- (Your Role Description card should look like this)
-
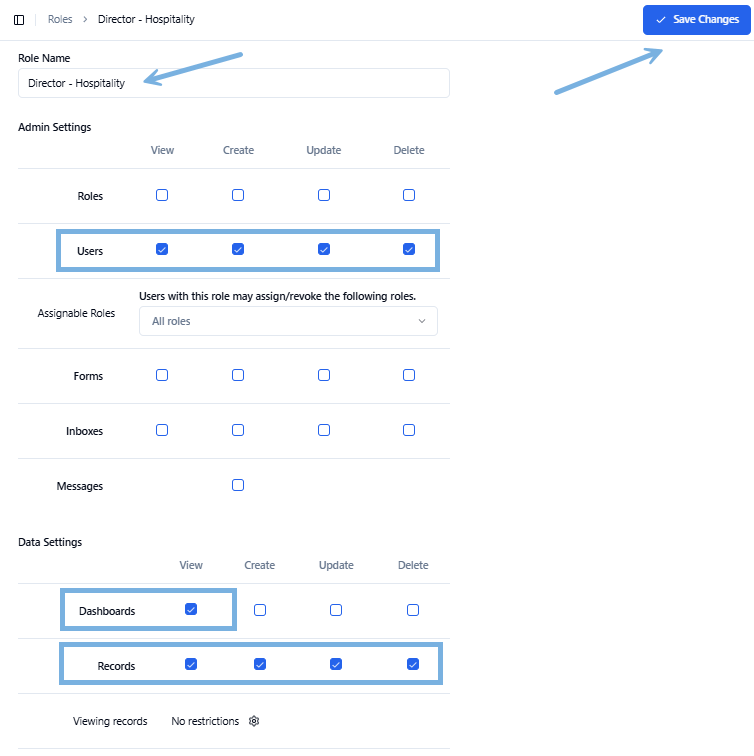
Name the second Role → Director - Hospitality
- Permissions →
- Users: View, Create, Update, Delete
- Dashboards: View
- Records: View, Create, Update, Delete
- Save Changes
-
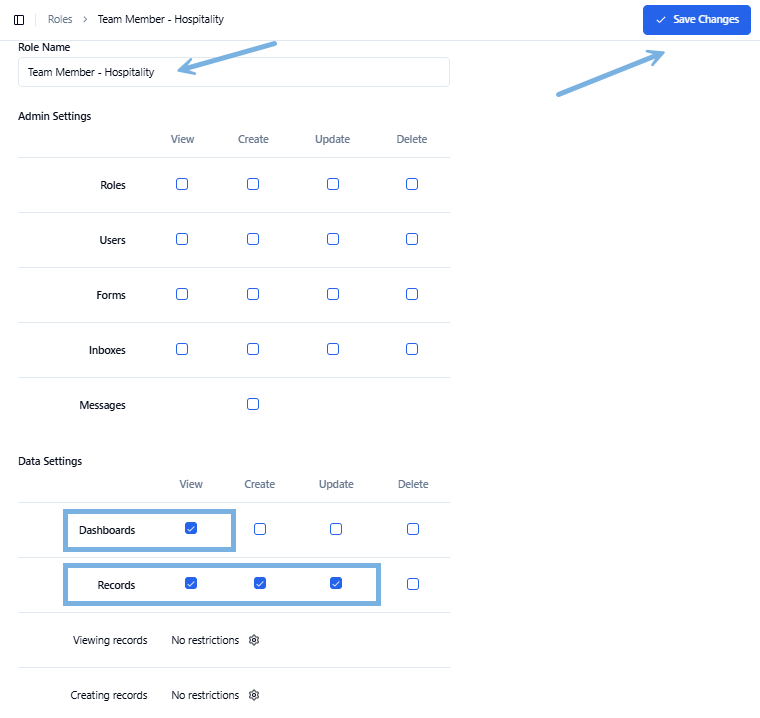
Name the third Role → Team Member - Hospitality
- Permissions →
- Dashboards: View
- Records: View, Create, Update
- Save Changes
-
-
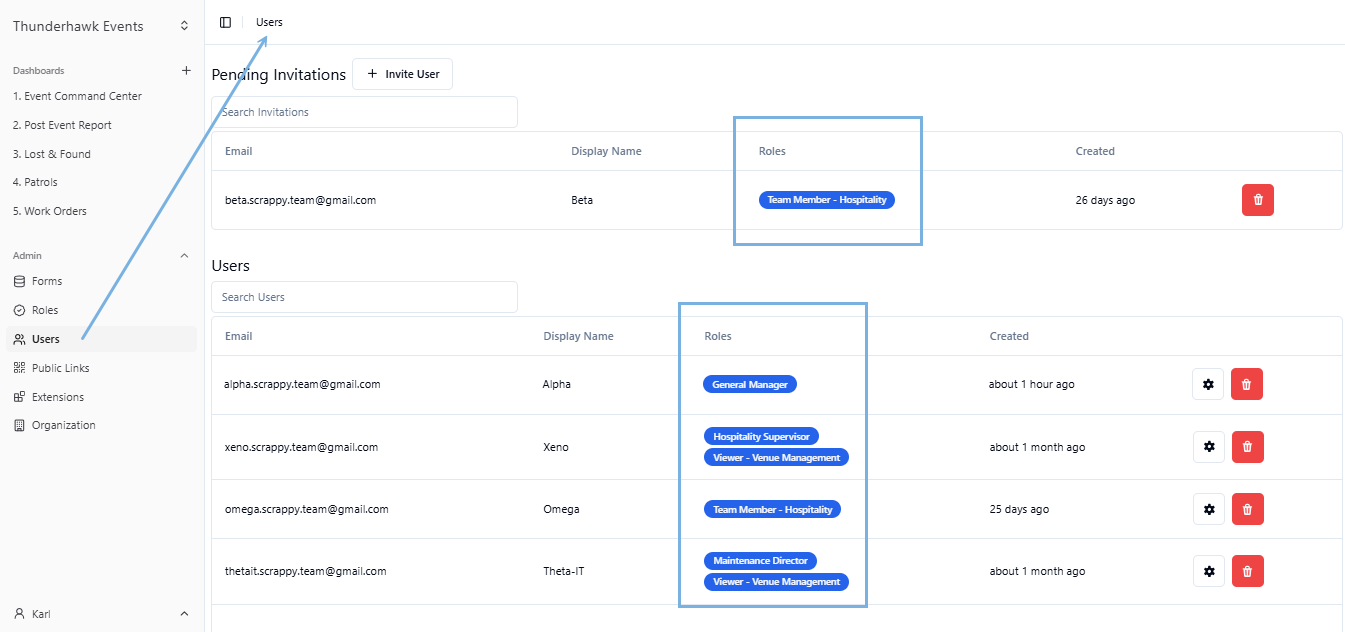
Invite three new Users → Hint ✋
-
First User →
- Email: tango.scrappy.team@gmail.com
- Display Name: Tango
- Role: Viewer - Venue Management
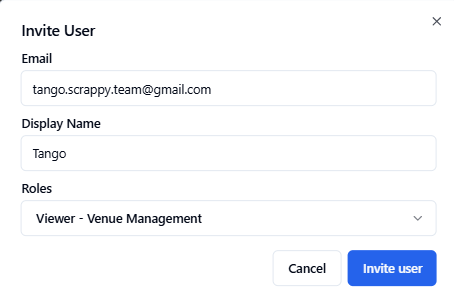
- Click Invite user
-
Second User →
- Email: beta.scrappy.team@gmail.com
- Display Name: Beta
- Role: Team Member - Hospitality
- Click Invite user
-
Third User →
- Email: alpha.scrappy.team@gmail.com
- Display Name: Alpha
- Role: Director - Hospitality
- Click Invite user
-
Note: Did you notice that your Role was greyed out? This indicates that your Role is protected
-
Set advanced Role restrictions for your Team Member of Hospitality following these → Steps ✋
-
Search for a User named Tango → Hint ✋
-
Delete a User's invitation → Hint ✋
- Delete Tango's Invite. (Sorry Tango!)
Read Hike up Kilimanjaro (2 min)
Then try this Extra Credit Quiz
Help Alpha decide what User level should be assigned to each of her colleagues:
Question 1: First up is Delta. Delta is a Marketing Manager running Experience Management surveys and Social Media for the venue. For Delta, information is everything as he digs into customer experiences looking for new posts and planning future Marketing campaigns. What access level should Delta have?
- If you guessed Viewer, you’re right! Delta only needs read-only viewership permission to assess the guest experience Reports and to make changes to his social media campaigns. Delta is not involved in the recording of incidents nor in the dispatching and rapid-reaction functions.
Question 2: Next we have Xeno. Beta is the venue's Maintenance Supervisor who accesses Dashboards multiple times each day to review incidents, plan repairs, fill out work orders and to help address guest issues. What user role should we assign to Xeno?
- That's right — Team Member-Level! Xeno needs to be able to edit Records, add Work Orders, and edit responses to guest concerns. Viewership alone won’t cut it.
Question 3: Finally, we have Omega, the venue's COO. As such, Omega logs into Guard IQ Dashboards to review feedback from all of the various touchpoints along the guest journey and experience. They must prepare reports for the management team. What access level does Omega need?
- Viewer access is all that’s required here, since Omega is chiefly a consumer of Dashboards and Reports. Just because Omega needs access to Dashboards doesn’t mean she needs to hold Leader-level, nor even Team Member access. Viewership is all that's required.
How did you do?
About Users & Roles
As you invite Users, you'll also assign Roles:
-
Roles → give Users the permission to perform their Role-based activities
-
Users → can only access relevant Records → For example:
- Security Team Records can be shielded from the Hospitality Team
- Risk Reports can be assigned on a need-to-know basis
- Maintenance Issues can be directed to the Maintenance team, with completed work shared broadly
-
Users may be assigned multiple Roles
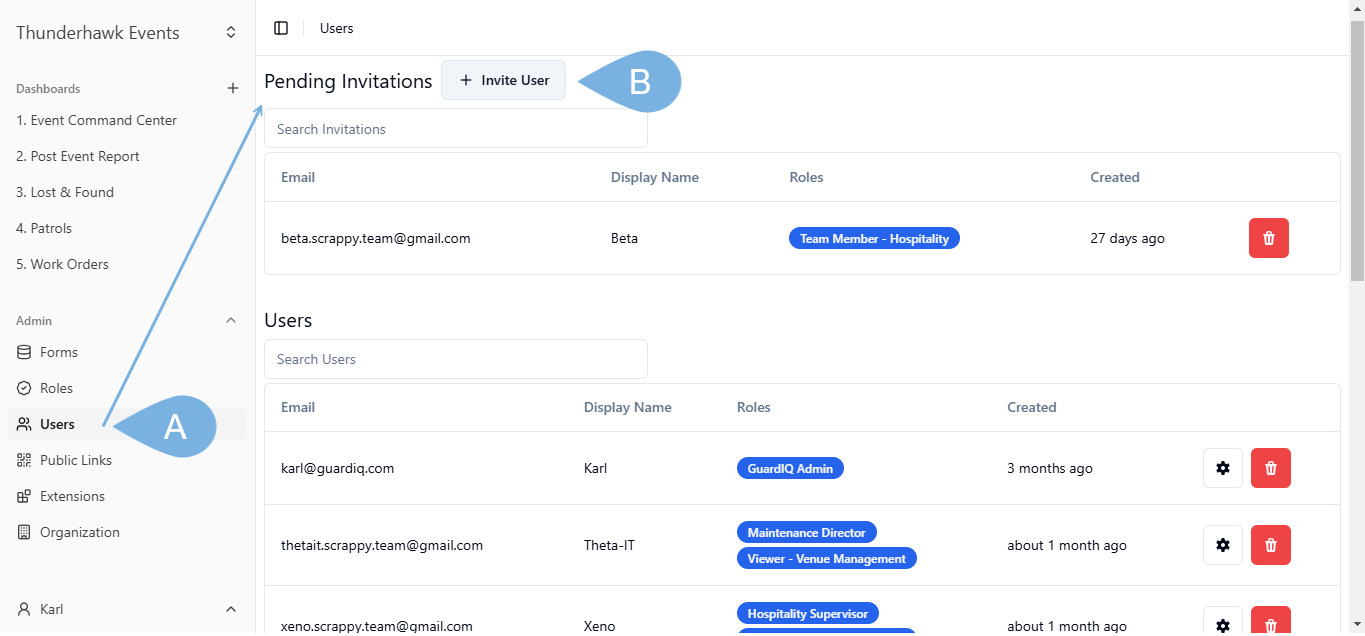
- Before inviting new Users, get familiar with the existing Roles defined by your Organization:
- A. Click Roles from the Navigation bar
- B. Scroll down to view all of your existing Roles
- C. Review the permissions on each Role Card
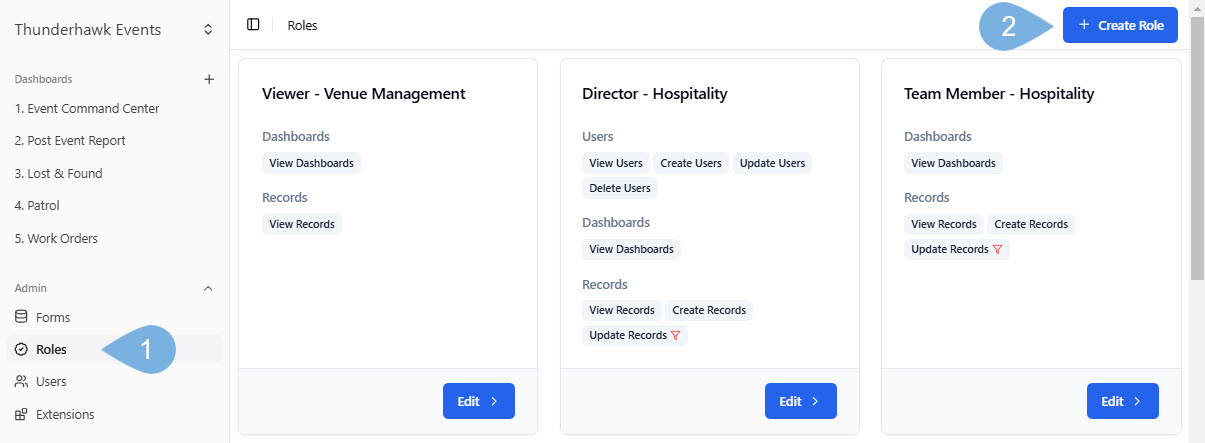
Create Three New Roles
To Create a new role:
-
Click Roles
-
Click + Create Role
-
Name the first Role → Viewer - Venue Management
- Permissions →
- Dashboards: View
- Records: View
- Click Save Changes
- Permissions →
-
Name the second Role → Director - Hospitality
- Permissions →
- Users: View, Create, Update, Delete
- Dashboards: View
- Records: View, Create, Update, Delete
- Click Save Changes
- Name the third Role → Team Member - Hospitality
- Permissions →
- Dashboards: View
- Records: View, Create, Update
- Click Save Changes
Invite New Users
To create a new User:
-
Select Users
-
Click Invite User
-
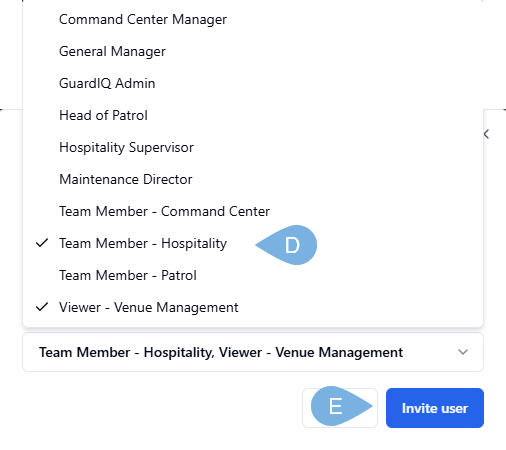
In the Invite User box:
A. Enter the new User's Email address
B. Provide a Display Name → ex. a first name
C. Pick the down arrow → to open the Roles drop-down list
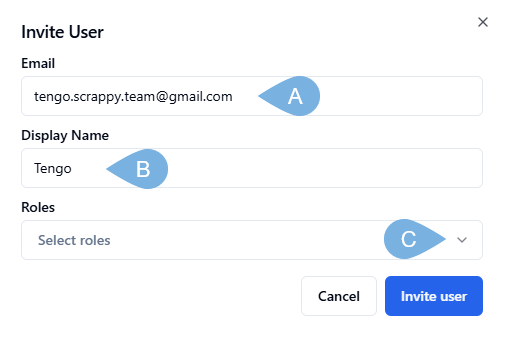
D. Select one or more Roles
E. Click Invite User
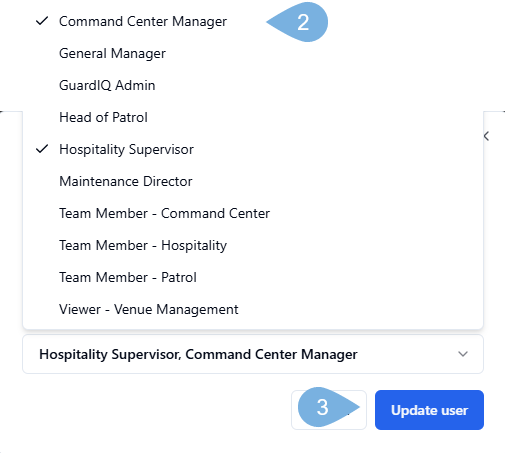
Update User Roles
Roles allow you to restrict User access to specific teams.
To update a User's Role definition:
-
Click the Gear icon → seen next to a User's name
-
In the Update User box → check or uncheck Roles from the drop-down list
- Click to add new Roles
- Users can have multiple roles
- Remove a Role by unchecking it
-
Select Update User
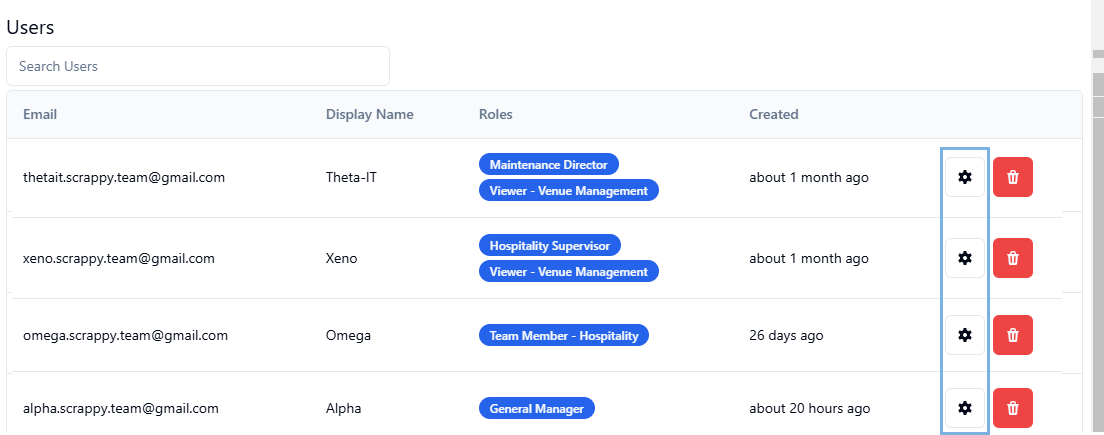
Delete Users
To delete a user from your Organization:
-
Open the Users page
-
Click the red Trash icon next to a name

- Select Remove User → or "Delete Invite"


Search through your Users
To find a User in a long, long list of Team Members:
-
Open the Users page
-
Click in the Search box → for either "Users" or "Pending Invitations"
-
Start typing a name → only a few characters will do the trick!

At some point, you may wish to grant multiple people Leader-level access to some of your venue's critical positions → ex. Manager-Command Center, Supervisor-Patrol, Head of Maintenance, etc.
Advanced Stuff
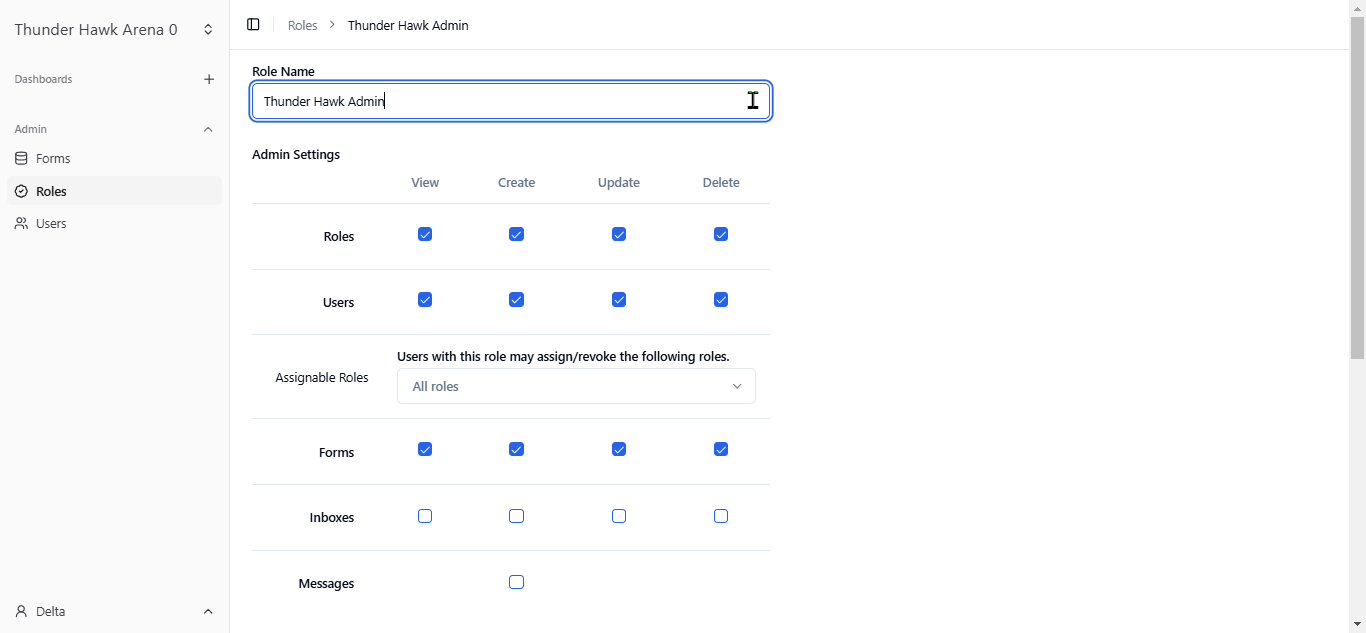
Examine your User Role at Thunderhawk Arena
-
Open the Users page
-
Click Edit on your Role description → Thunderhawk Admin
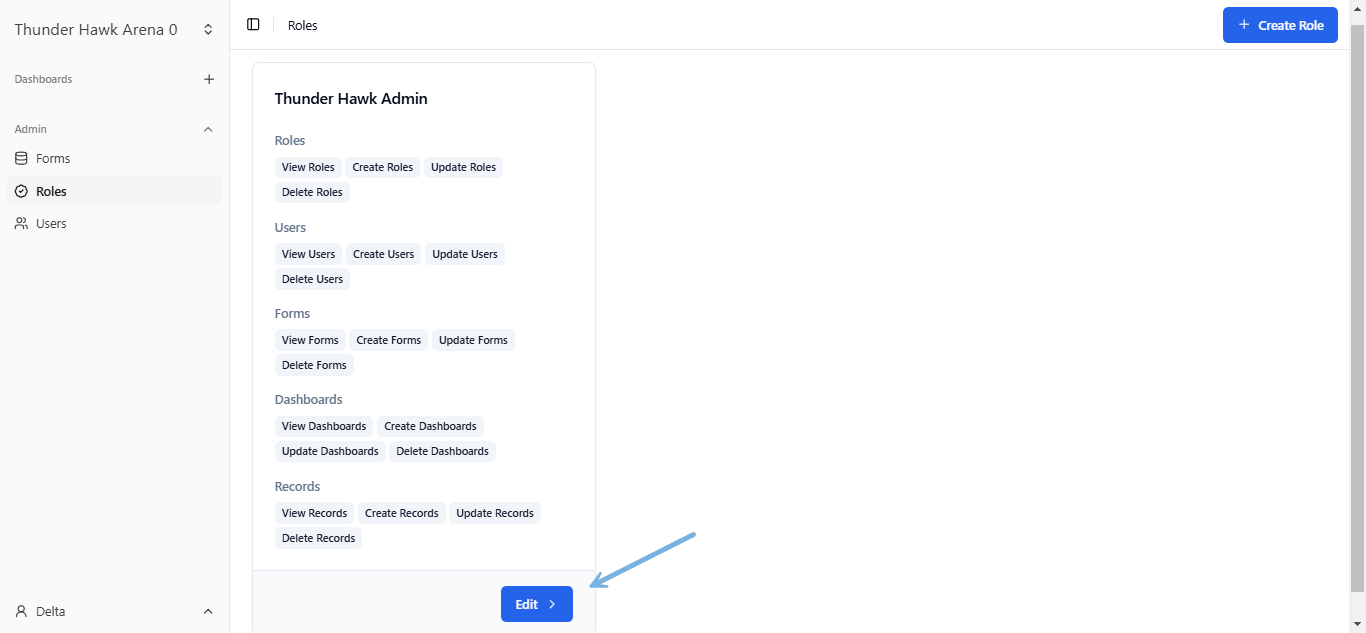
-
Notice that nearly all boxes are checked! You can do anything, with the exception of managing SMS inboxes!
Set advanced (granular) Role restrictions
There are many reasons why you may wish to dramatically restrict a Role. For example, you may not wish one team to see the records of another, for a couple of reasons:
-
Some Records may be confidential. For example, the Security or Risk Teams may wish to shield their Records from the Hospitality or Maintenance staff.
-
Other teams simply may be inundated with records from other teams that don't concern them! For example, the Hospitality team does not want to weed through all of the Patrol records, and vice versa.
-
In this example, Hospitality Team Members:
- Can see all upcoming Events (Past, Present, & Future)
- Can only view Issue Records that come in for the Hospitality team to act on
- Can't see Records meant for any other department → ex. Security or Patrol

To restrict a Role beyond the basic settings:
-
Click Roles
-
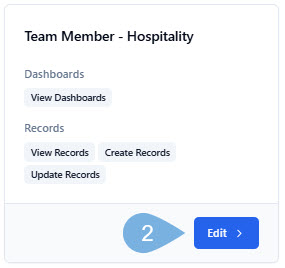
Tap the Edit button on any Role you wish to further restrict → ex. Team member - Hospitality
-
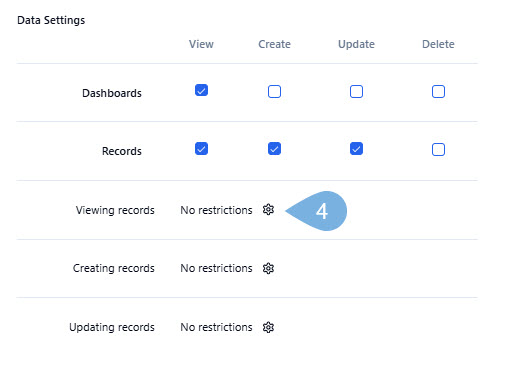
Open the Gear icon → appearing next to the User permission you wish to restrict
-
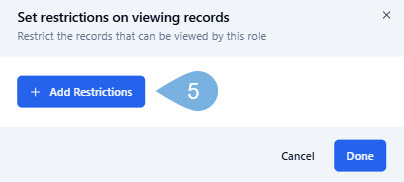
Click Add Restrictions
-
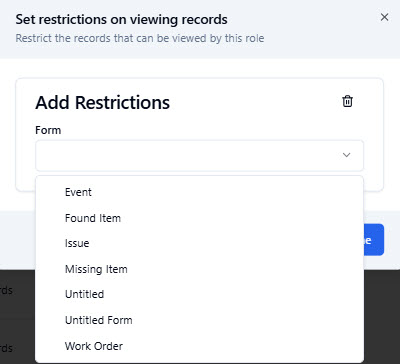
Pick the Form that you want to restrict → ex. Event or Issues
-
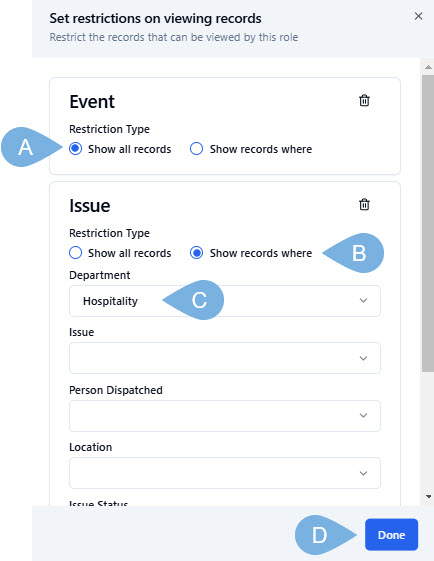
Click the various permissions:
- A. Events → Give access to all events by selecting Show all records.
- B. Issues → Limit access to Hospitality issues by clicking Show records where
- C. Pick the Hospitality department from the list
- D. Click Done
-
Click Save Changes (And Don't Forget!!!)
A Hike Up Kilimanjaro
As your program develops, your frontline users will manage records, respond to incidents, analyze results and report your success. To make operations run efficiently and securely, each User is assigned a set of Role-based permissions. And, Guard IQ will be there every step of the way to ensure that each of your Users have the permissions they need to do their jobs effectively.

You may be tempted to think, "Why not place everyone in a leadership role (make them all Supervisors) and be done with it?” This certainly would remove any Role-based limitations. Albeit, this could pose a significant security and data integrity risk.
Keep in mind that Team Member status is NOT an impediment to the completion of the tasks at hand! This is the very User level that can create Records, Add Events, respond to incidents, review results, and act during emergencies. For most users, being a Team Member is permission enough.
Any Leader-level supervisors you create can, innocently enough, go rogue and make some questionable changes without your knowledge! Given this power, we recommend giving Leadership status only to those with the authority to make managerial and administrative-level decisions. Plus, there is such a thing as too many cooks in the kitchen!
Advantages of multiple Leaders
That being said, it is helpful to have backup Supervisors and multiple Managers in critical parts of your operation!
Imagine if the Hospitality Manager — named Alpha — takes a few weeks off to hike Kilimanjaro. Alpha can’t add Users and Events during the fortnight trek up the volcano. (There are no 5G bars up there. No bars of any kind, for that matter!)

Luckily, Alpha upgraded Beta as the designated backup Hospitality Manager in her absence. While the leader is on the mountain, Beta can avoid any bottlenecks and address any unexpected explosions during Alpha’s volcanic absence that can toss critical events onto the ashen cinders of neglect. (Did we overdo the volcano thing?)