A Brief Walkthrough Guard IQ
About Guard IQ
Guard IQ is transforming shared spaces with AI-powered incident management, status tracking, patrols, dispatch, lost & found, post-event reporting, work orders, contextual SMS, mobile apps, and more.

Seamlessly integrating traditional and mobile technologies, Guard IQ adapts to any venue or event using the devices you currently have — bringing Mobile Command Center capabilities to your fingertips.

Create Incident Records
Incident Records are created with intuitive Forms tailored to your exact needs. Real-time Dashboards provide immediate insights and actionable AI-powered Reports.
Creating Records is a snap. For example, Ward slipped and spilled his drink, and popcorn, all over the walkway above Section 107.

To create a Record → and track the status of Ward's colossal spill:
-
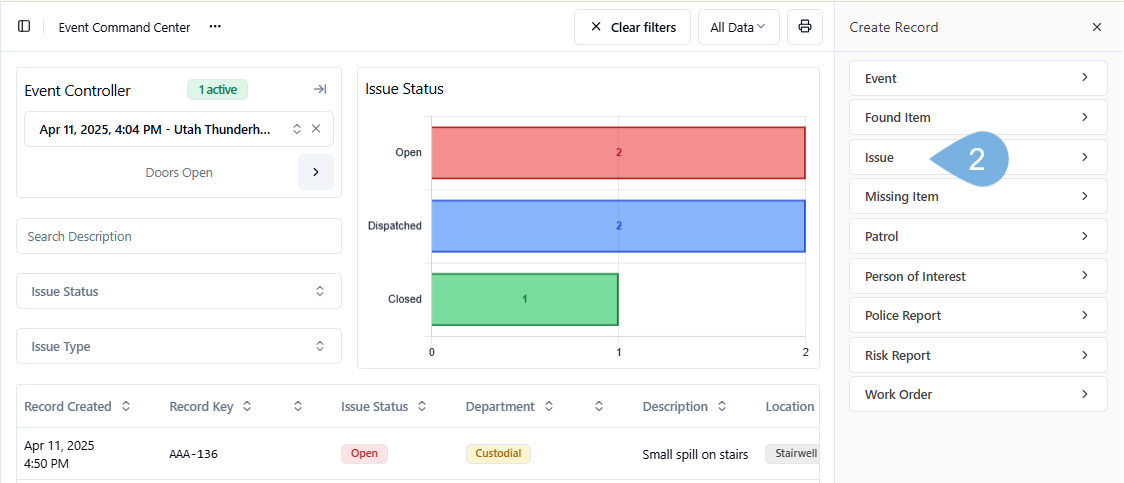
Click the + Blue Create Record icon
-
Select a Form from the Create Record panel → ex. Issue
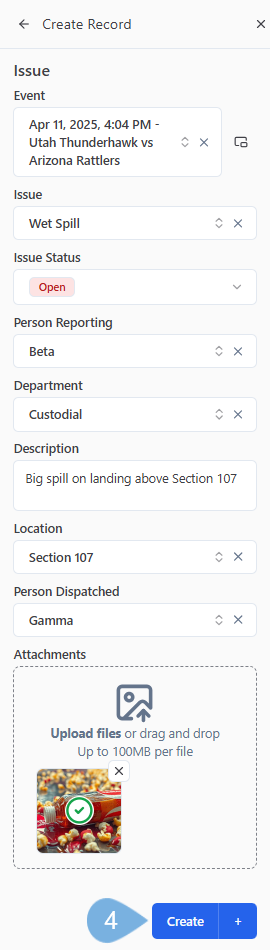
Complete the Form
-
Fill in your Form
-
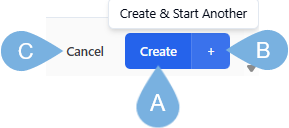
To save, click:
- A. Create → to save and leave the Record open to review
- B. Create + → to save and select a new Form simultaneously (Recommended)
- C. Cancel → to return without saving
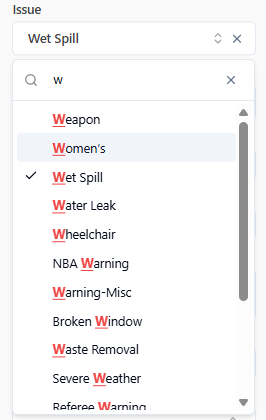
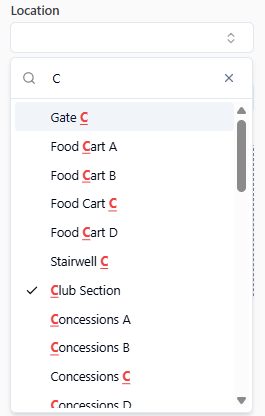
Quickly find Issues & Locations
-
You may have hundreds of Locations and long lists of Issues. To select quickly, simply enter a few letters or numbers →
-
w for "Wet Spill"
-
C or cl for "Club Section"
-
7 for 'Section 107'
-
s7 also for 'Section 107'
-
-
Everything matching the letters and numbers will pop up in the blink of an eye. Just pick from the list!


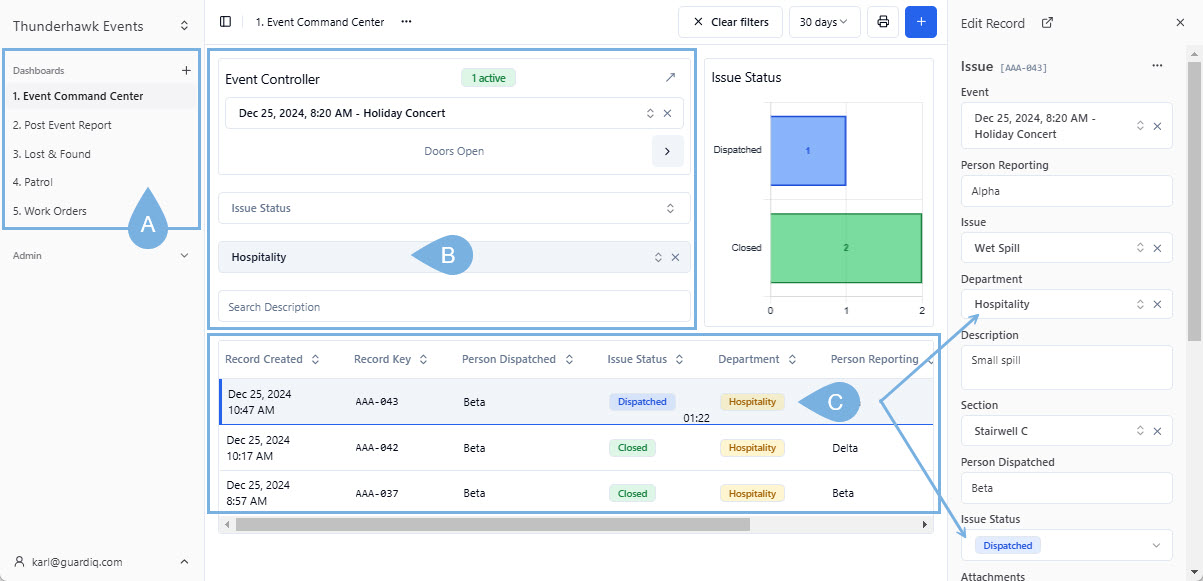
Update & Track Records
To track and alter Records:
-
Click any Record in your Records Table → to open its Form in the Edit Record view
-
Update your record → ex. Issue Status → to Dispatched or Closed
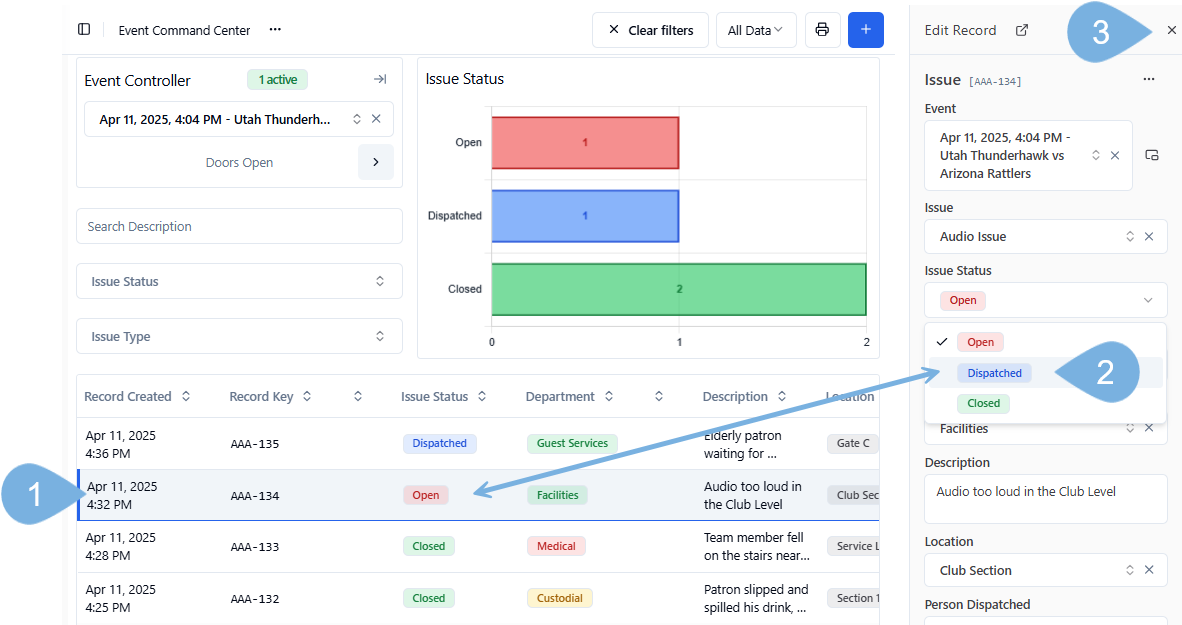
-
Select X to Close an open Record
Advance Event Markers
Many venues add Event Markers so they can segment the various parts of the Event for post-event analysis.
To advance Event Markers for an active Event:
-
Click the advance icon in Event Controller → ex. Setup > Doors Open > 1st Quarter >
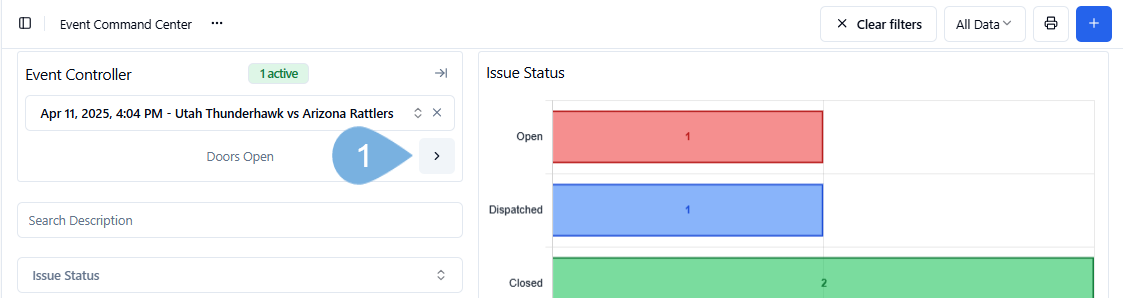
-
Choose Continue to confirm → ex. > 2nd Quarter > Egress > Doors Closed

Save Time with Shortcuts!
Shortcuts are customized, pre-populated templates. With Shortcuts, you can pre-select default Values and hide unnecessary Fields.
-
Open Shortcuts by clicking the primary Form → ex. Event

-
Pick from the list! Event Shortcuts may include Basketball, Concert, Hockey, and Other
- Learn more from our Make Shortcuts article
Delete Records
To delete a Record:
-
Click the ellipsis (...) at the top of a Record
-
Click Delete Record

-
Click the red Delete button to confirm the deletion

- Permission to delete Records is set in your Role designation
- If you need to delete, consult with your Supervisor, Manager, or Admin, who will contact Guard IQ about a Role update
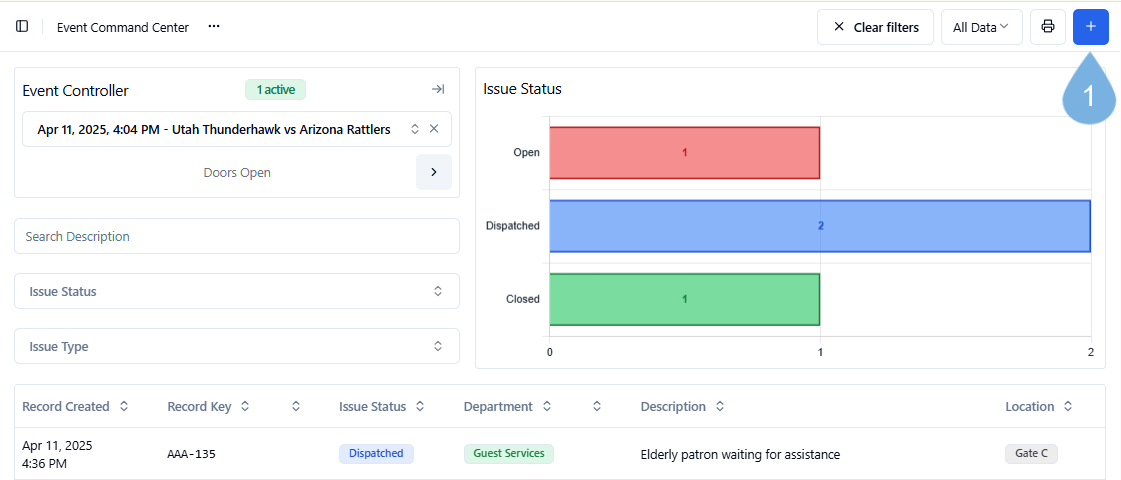
Filter your Dashboards
-
Organize and segment your Records with:
A. Dashboards → ex. Event Command Center, Post Event Report, Lost & Found, Patrol, Work Orders
B. Filters → ex. Event, Issue Status, Department, Description
C. Records Table → ex. Date Created, Record Key, Dispatched
- Click any Record to open the Form's Edit Record view and make updates
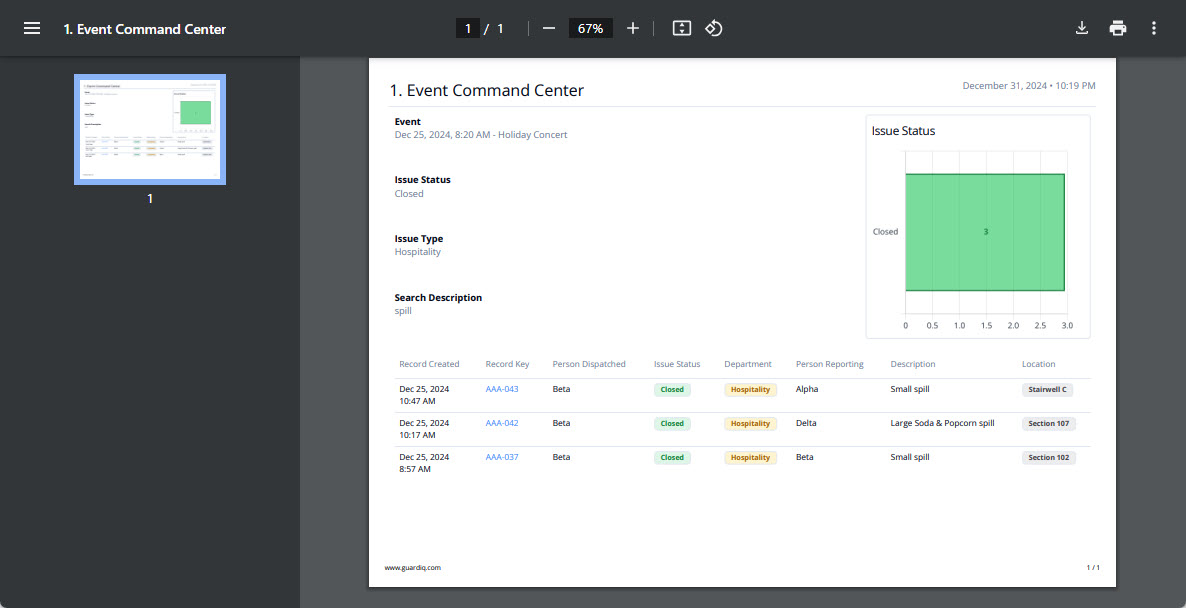
Download PDF Reports
To filter and create a PDF Report:
-
Select a Dashboard
-
Filter your Report:
A. Filter Events in the Event Controller
B. Apply optional Filters → ex. Closed, Hospitality, Spill
-
Click Print/download
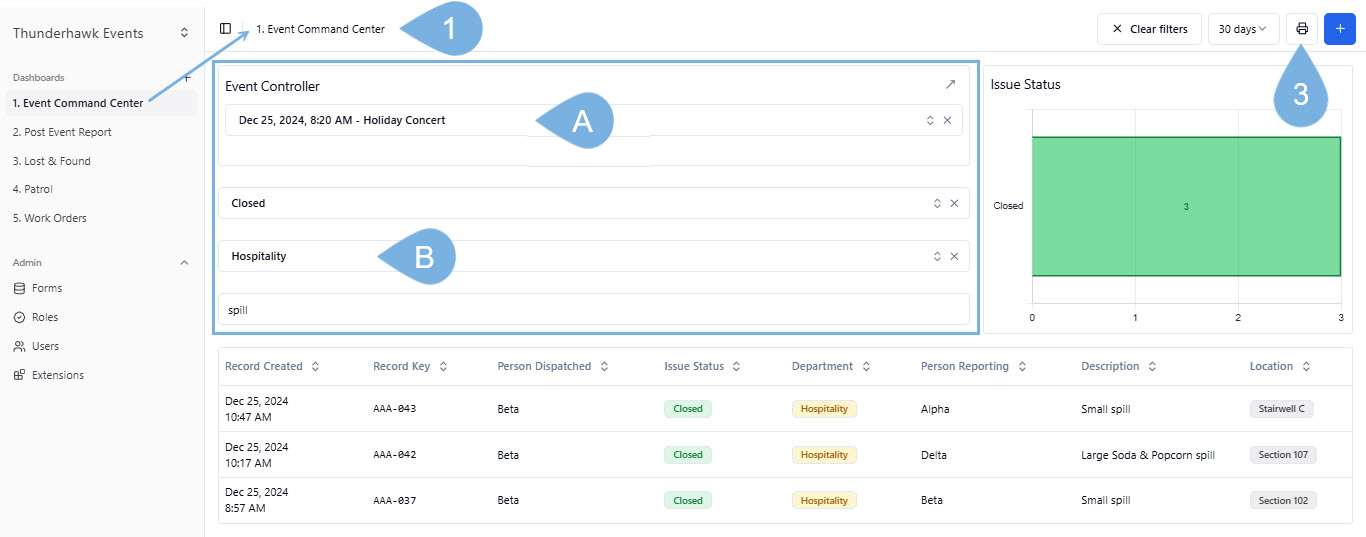
-
Select either Portrait or Landscape
-
Click Download
 Share, print, or post your PDF reports
- See View & Publish PDF Reports to learn more
- See View & Publish PDF Reports to learn more
Summarize an Event with AI
To generate and refine a summary of your event:
-
Select an Event from your Event Controller
-
Click open the Event's Record
-
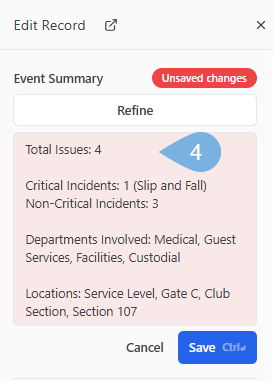
Scroll down and find your 'Summary' Field → and click its AI icon
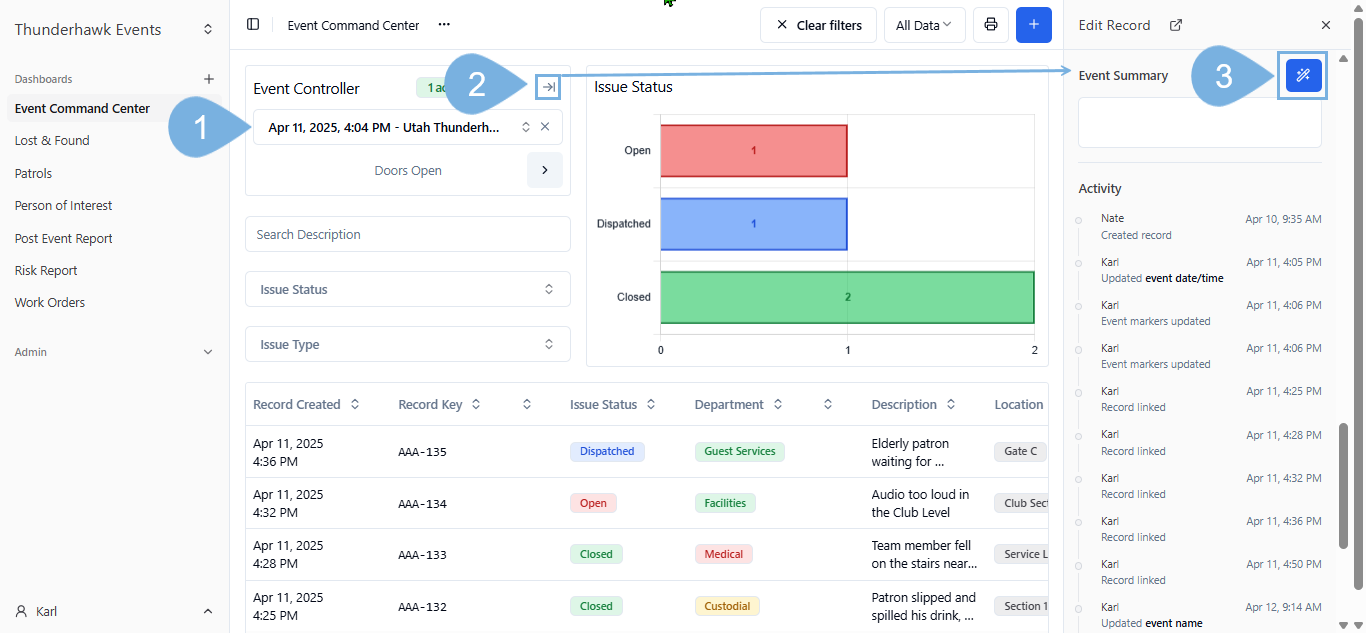
-
Blink as your event's Records are summarized
-
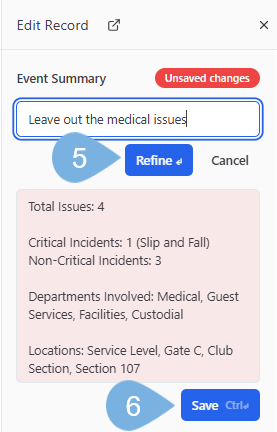
Improve and focus your summary by adding or excluding information → ex. "Leave out the Medical issues" → then click Refine
-
Continue refining until you are satisfied → then click Save
-
Copy and paste your summary from it's window → then place it anywhere you like

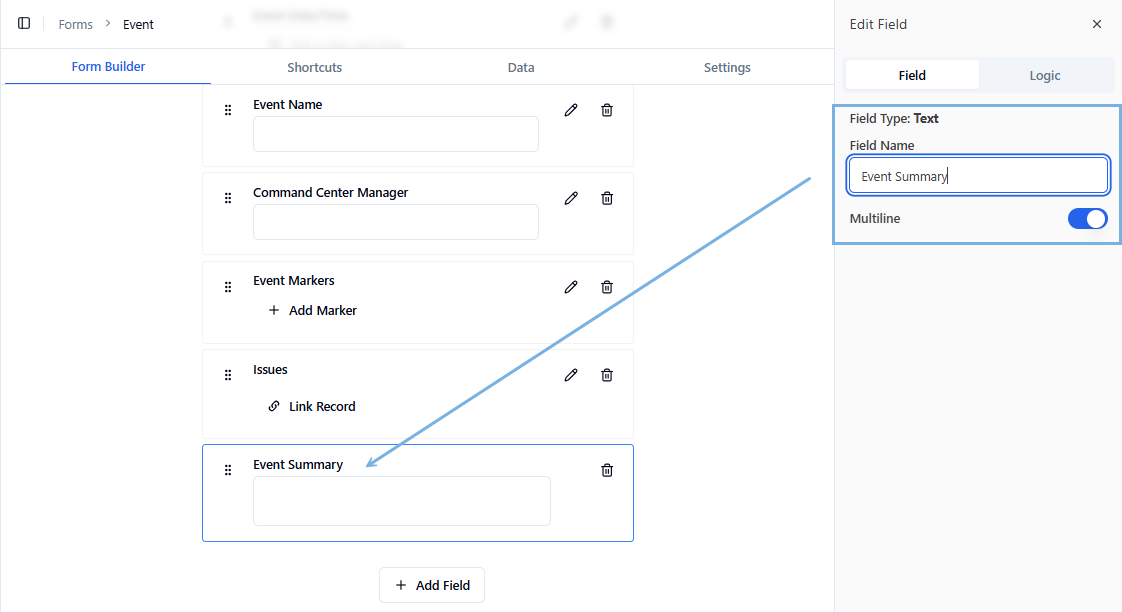
- The name of the Event Summary Field can vary
- However, it must be a Multiline Text Field
- And, the Form must have have one or more Linked Records attached
- If you have questions, ask your Guard IQ Admin for help setting up your AI Summaries