Run 10 → Add Lists, Locations & Issues to Forms
Introduction
Learn how to create Select drop-downs lists, add items, and update your lists for quicker data entry. We'll show you how to:
- Create and modify a list of Team Members
- Update the list of Locations for Thunderhawk Arena
- Update the list of Issues commonly experienced at Thunderhawk
- You'll be able to test the updated Forms and Event Center Dashboard using a Mobile device
- Read the latest in our Run 10 article →
- If you need practice
- Work through the 'Try it!' checklists in your Sandbox (Thunderhawk Arena)
Try it!
→ on Event Computers
A. Start by reading → All About Select (or Drop-down) Lists (5 min)
B. Then return here and complete this Hands-on Checklist
Hands-on Checklist
- Log into Guard IQ on your Event Computer → Hint ✋
- Open your Thunderhawk Arena "sandbox" organization → Hint ✋
-
Add a Select drop-down list of Team Members to your Report Found Item Form → Steps ▶
-
Add a new person to your Select drop-down list of people in your Report Found Item Form → Steps ▶
-
Correct a spelling mistake in your Select drop-down list of people in your Report Found Item Form → Steps ▶
-
Color code your people in the Select drop-down list in your Report Found Item Form → Steps ▶
-
Alphabetize the people in the Select drop-down list in your Report Found Item Form → Steps ▶
-
Reorder the list of people in the Select drop-down list in your Report Found Item Form → Steps ▶
-
Delete a team member from the Select people drop-down list in your Report Found Item Form → Steps ▶
-
Review how to delete an entire Select list from a Form, but don't actually do it now → Hint ✋
Use the Bulk Add technique to update a list
Before starting, review the Bulk Add instructions → Steps ▶
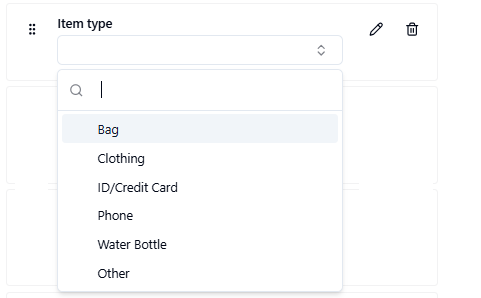
- Compare the existing Item type list found in your Report Found Item Form to the new list seen below the image. You'll see 4 duplicate, 6 new, and 2 redundant items
| EXISTING LIST | NEW LIST |
|---|---|
| ID/Credit Card | ID/Credit Card |
| Phone | Phone |
| Water Bottle | Water Bottle |
| Other | Other |
| Keys | |
| Hats/Caps | |
| Eyeglasses/Sunglasses | |
| Jackets/Sweaters | |
| Merchandise | |
| Wallet/Purse |
- Copy this list below, then use the Bulk Add technique to update the list → Steps ▶
| COPY THIS LIST |
|---|
| ID/Credit Card |
| Phone |
| Water Bottle |
| Other |
| Keys |
| Hats/Caps |
| Eyeglasses/Sunglasses |
| Jackets/Sweaters |
| Merchandise |
| Wallet/Purse |
-
Delete Bag and Clothing from the list
-
Alphabetize → and then color-code the list
-
Click ✓ Save Changes
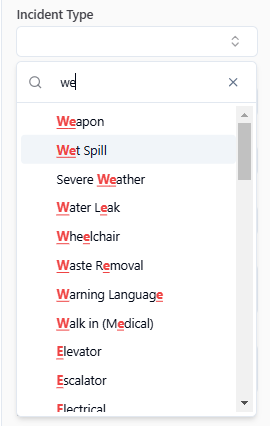
Add a long list of Issues
- Add a big, bulky list of Issues to a Form → Steps ▶
- Add over 100 Issues to a Select drop-down list to your Issue Form → Copy this list
Update Bulk Locations
→ on Mobile Devices or Event Computers
Hands-on Checklist
Add 6 new Lost & Found and Issue Records
-
Use your forms to add 3 Lost items during an Event you select → then close them out by reporting the Lost Items Found
-
Create 3 Records with the Issue Form → Hint✋
- Tie the 3 Issues to one of the Events you entered in Step 2 above
- Include a Description of each of your new events
- Add Locations to your Issues
-
View and Filter your Dashboards to see how these 6 Records now look
All About Select (or Drop-down) Lists
If you need to create a drop-down list of items you're in the right place.
- All of these examples use Select Fields to allow choices from predefined lists:
- People
- Found Items
- Locations
- Departments
- Issues
The nice part? If you can update one drop-down list, you can update them all!
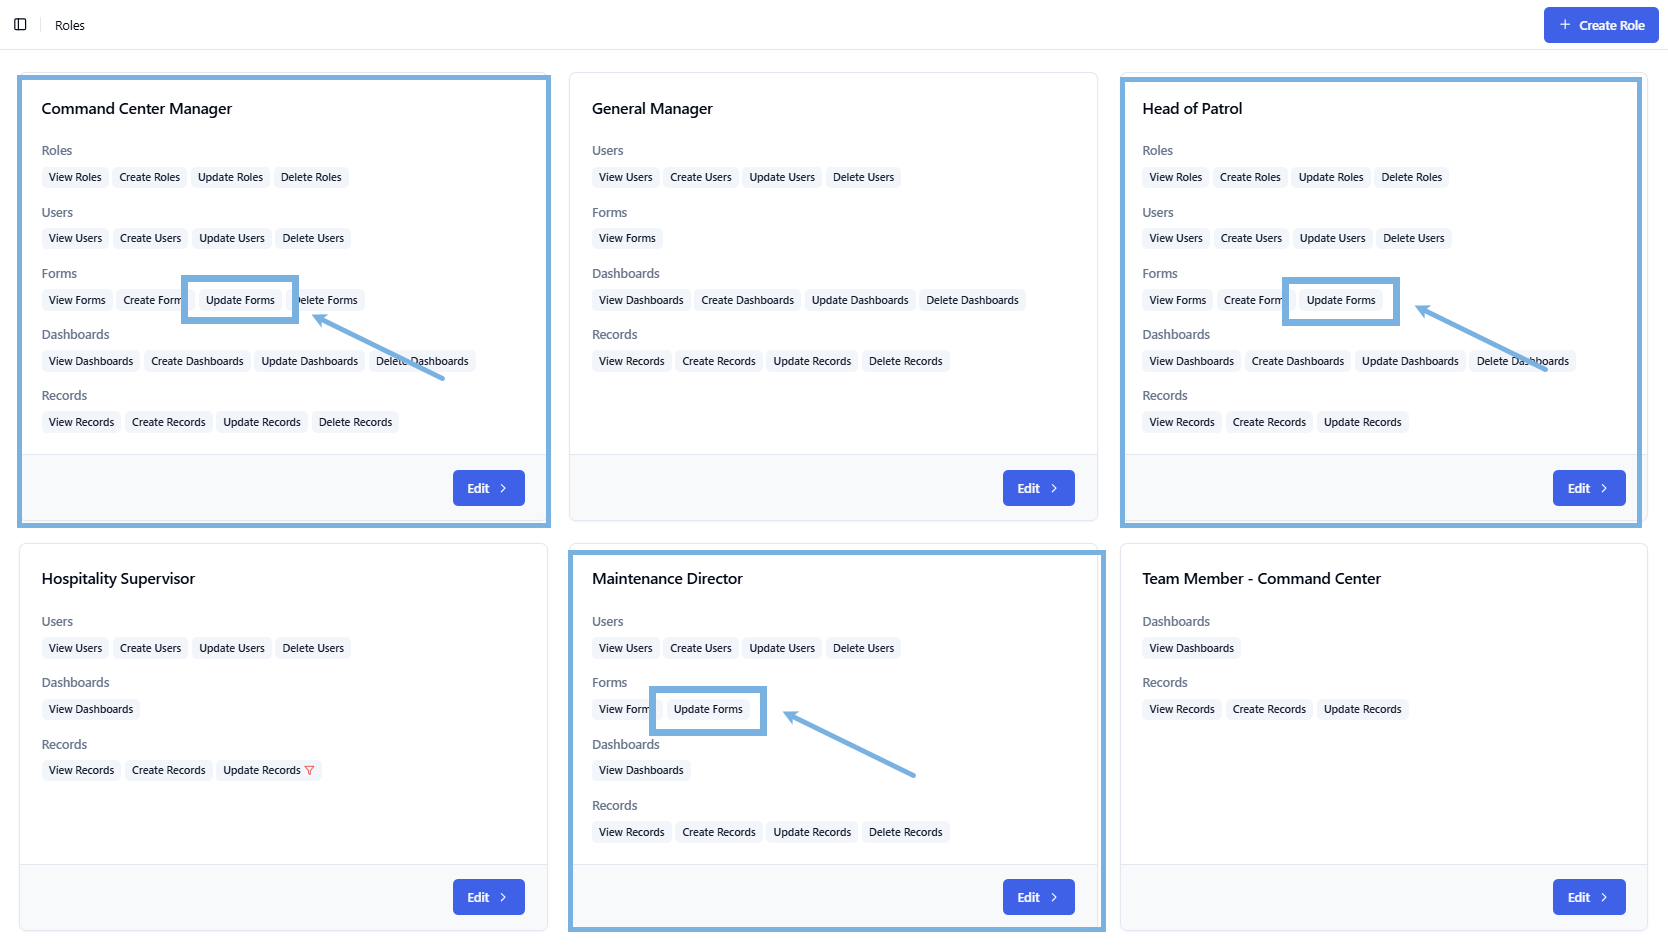
As you were invited to Guard IQ, you were also assigned a User Role.
- Roles → limit a User's access to their specific activities in Guard IQ
To add Locations you must have Leader-level access, and have the Update Forms permission turned on. At Thunderhawk Events, this permission has only been given to specific Supervisors — like the Command Center Manger, Maintenance Director, and Head of Patrol.
Every venue will make different choices. (See About Role-based User Access)
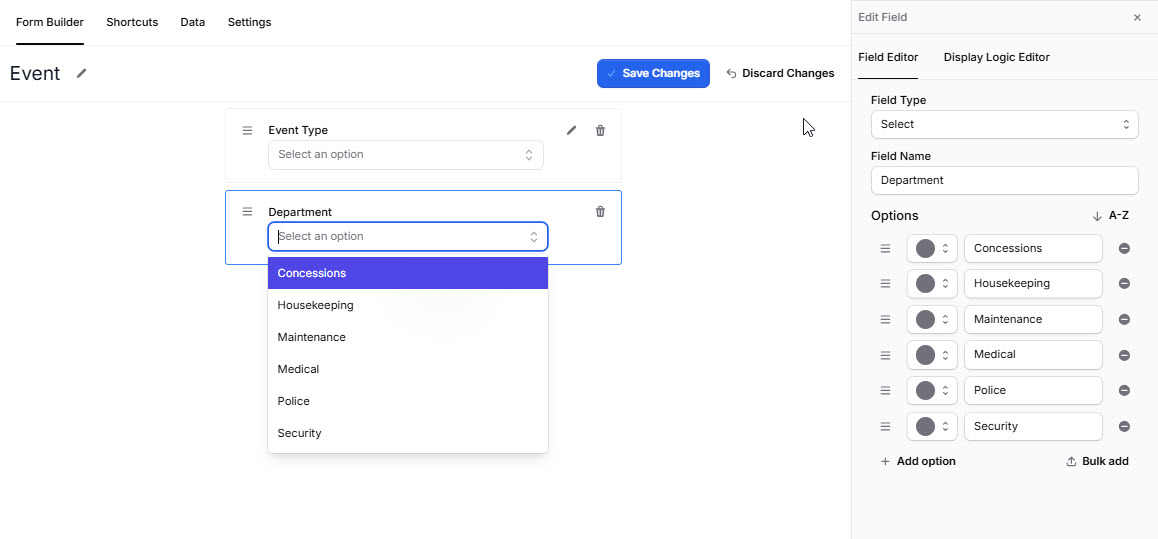
Add a new Select List of Team Members to a form
The Team Member who brings in the most Lost Items for the season will receive an all expense trip to Hawaii! To run the contest, their names must be added to a Select list in the Report Found Items Form.
-
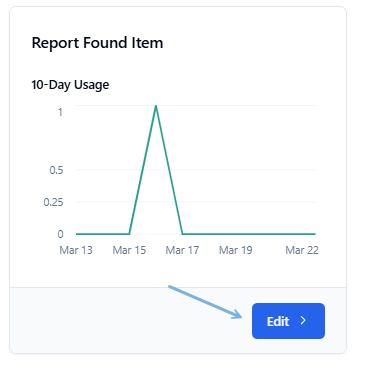
Open a Form by clicking Edit → ex. Report Found Item, Issue, or Patrol
-
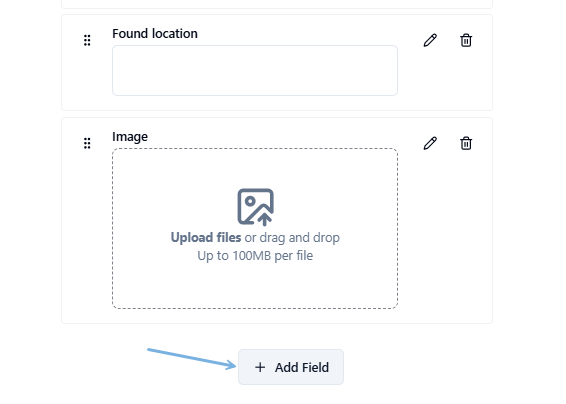
Scroll to the bottom of the Form → and pick + Add Field
-
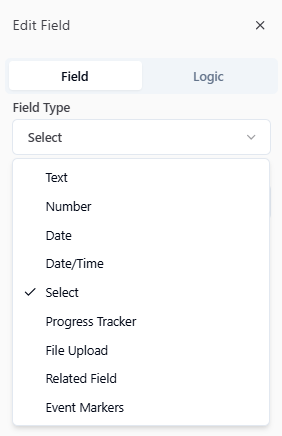
Pick Select from the Field Type drop-down
-
Name the field in the Field Name box → ex. Performed By
-
Tap the + Add Option
-
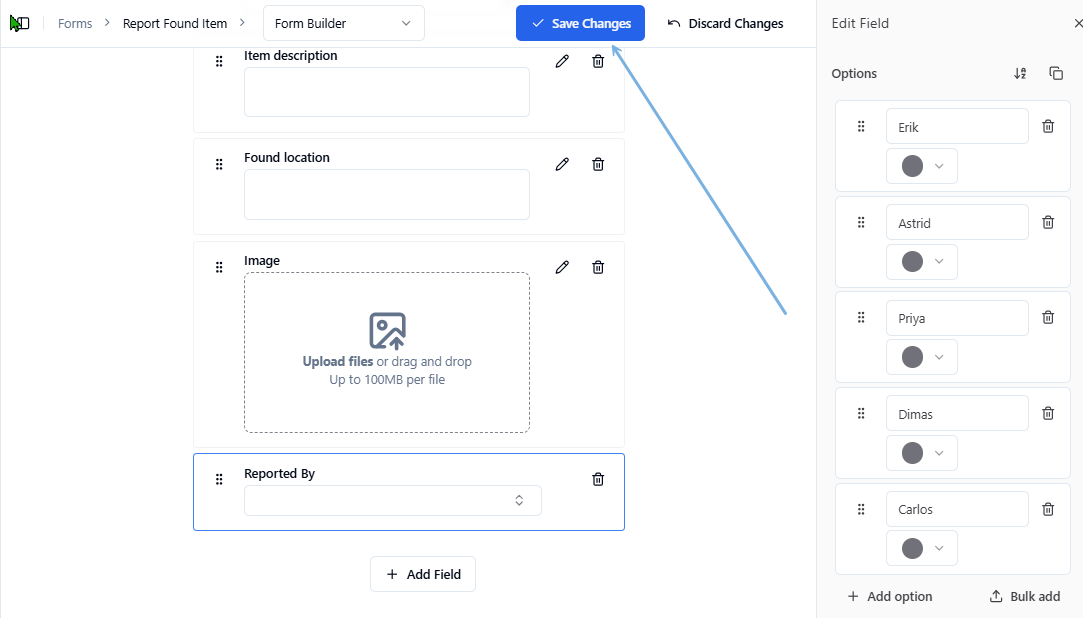
Enter the first name → ex. Erik → and press Enter

-
Add four more names to the list → ex:
- Astrid
- Priya
- Dimas
- Carlos
-
Select ✓ Save Changes
Update your List
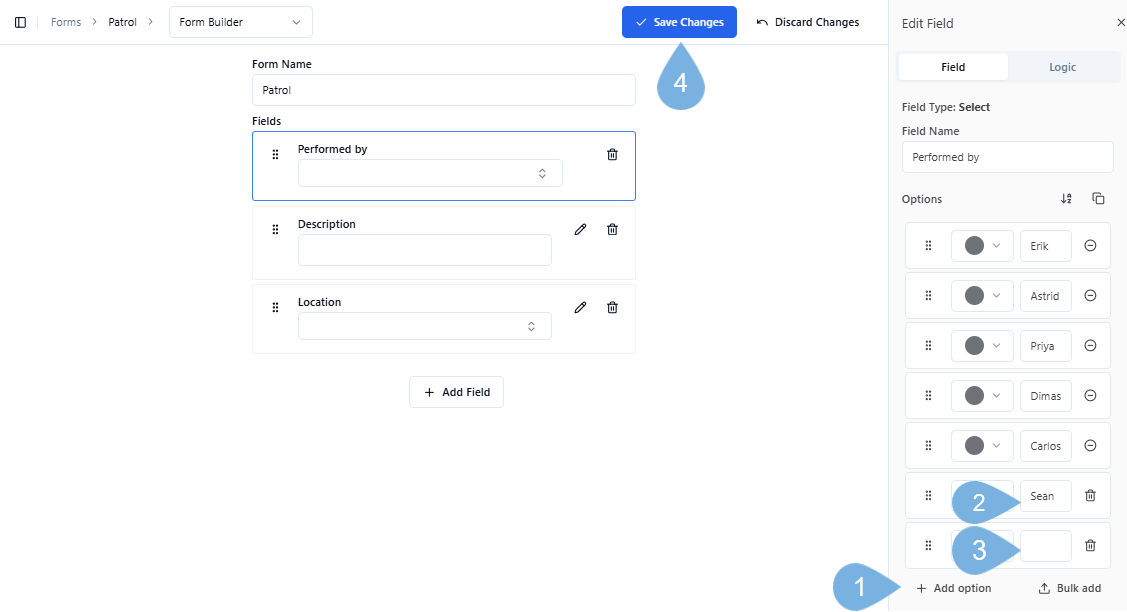
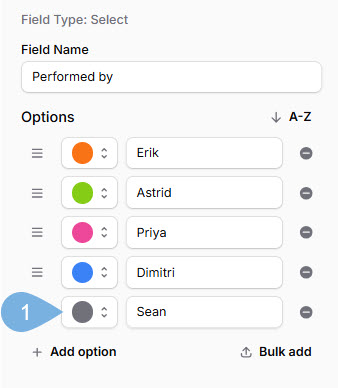
Sean was left off the list!
To update a Select Field's options → ex. Names, or Performed By:
-
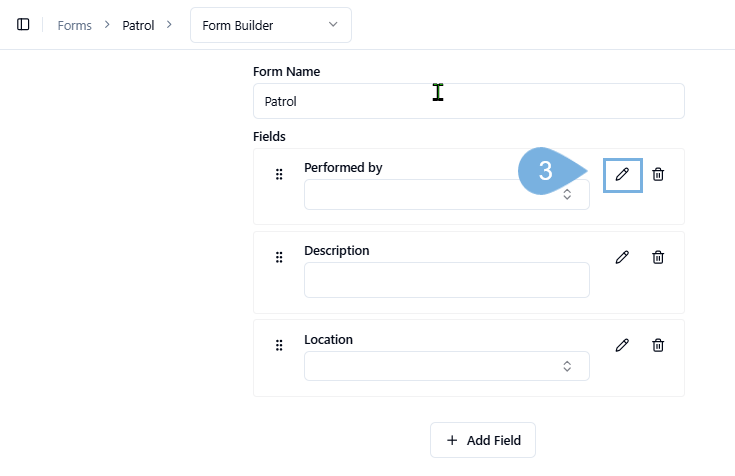
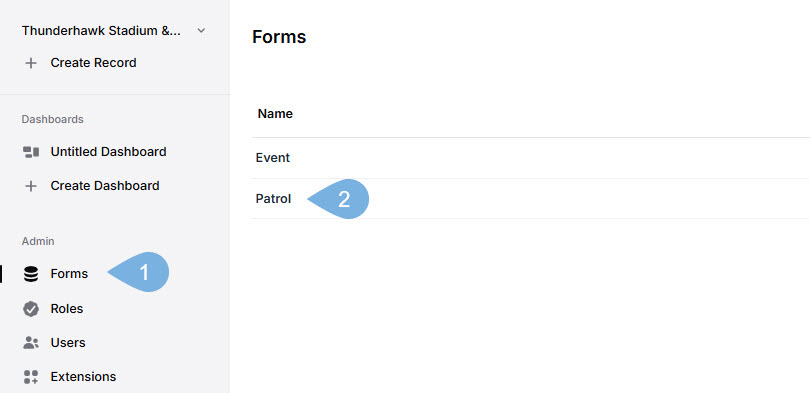
Click Forms from the Navigation panel
-
Open your target Form → ex. Report Found Items, Issues, or Patrol
-
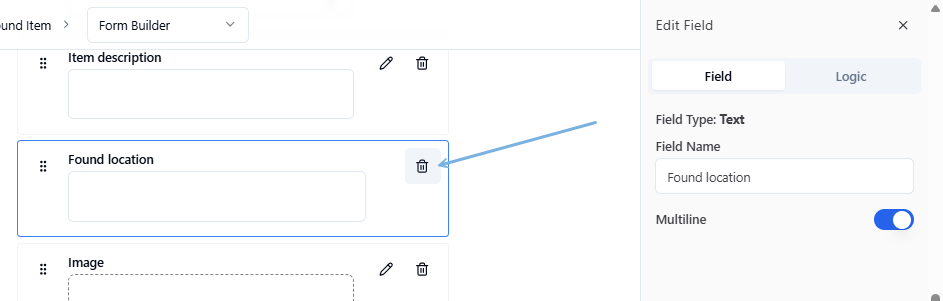
Click the editing Pencil in the corner of any Select Field → ex. Performed By
To add names (or options) to a drop-down list:
-
Tap the + Add Option button
-
Enter a new name → ex. Sean
-
Press Enter → or click + Add Option to add more items to the list
-
Select ✓ Save Changes
Correct spelling mistakes
-
Click any of the Options in your list
-
Fix the spelling → ex. Dimas to Dimitri
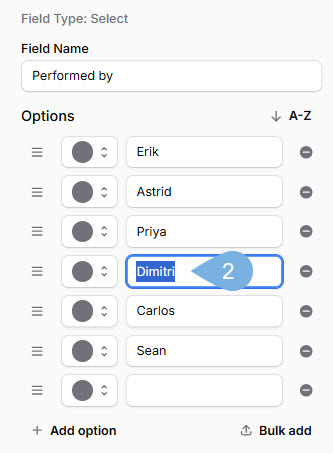
- Note: Blank fields, as seen above, will be ignored
-
Select ✓ Save Changes
Color coding options, lists & widgets
When you apply colors to a Select list, you’ll see them pop up in your Dashboard widgets. The colors can help you spot things quickly!
Pick your colors from the color palette.
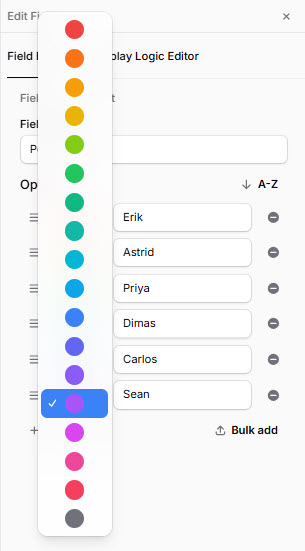
To add a splash of color:
-
Click the grey circle → and pick a color
-
Select ✓ Save Changes
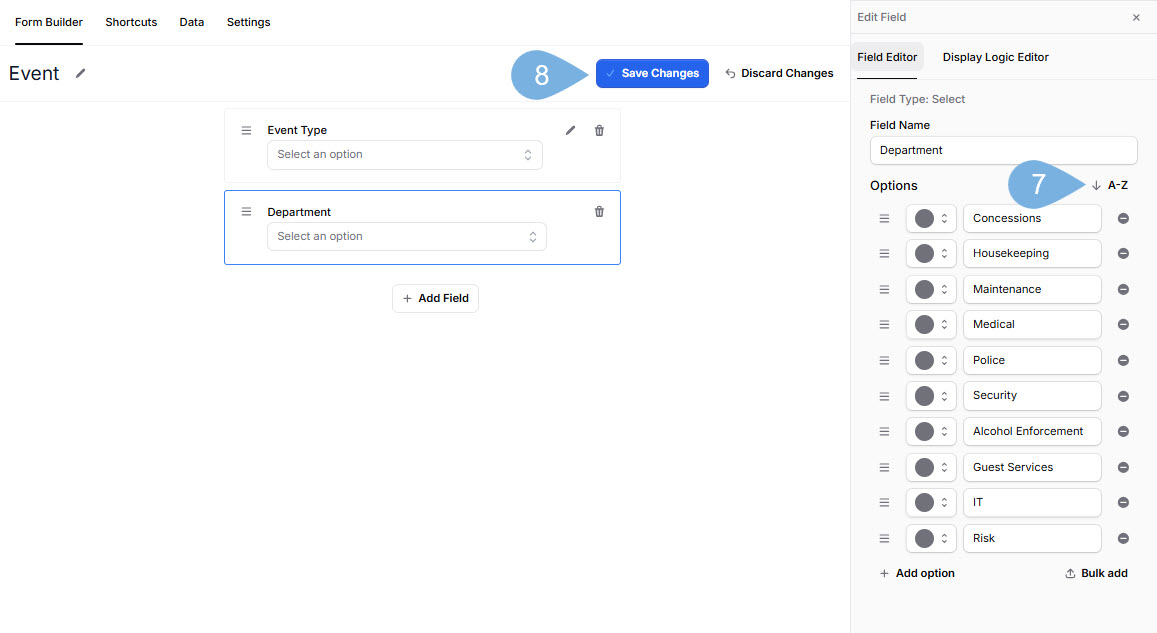
Alphabetize a drop-down list
To quickly alphabetize a list:
-
Click the A-Z button
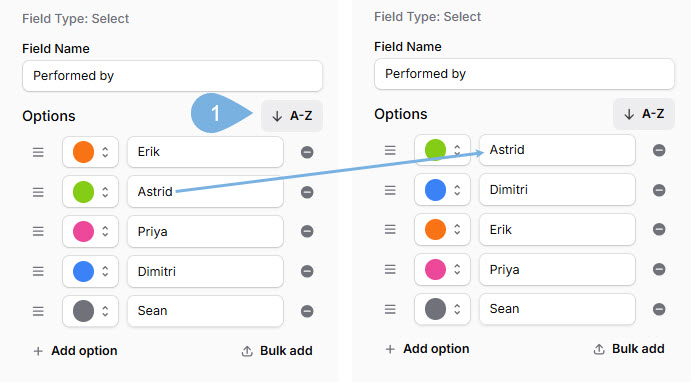
-
Select ✓ Save Changes
Reorder a list
Carlos is a team leader and will be selected most often. So why not move him to the top?
- Click and drag the Hamburger icons up (or down) to move Carlos into position
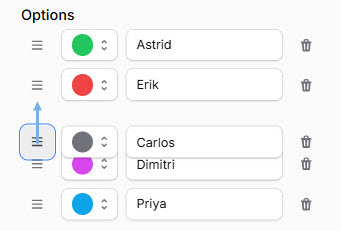
- Select ✓ Save Changes
Delete items from a list
Carlos has been promoted to another team!
To delete (and later restore) an item in a list:
-
Click the (-) Delete icon to the right of any items you wish to remove → ex. Carlos
- If you delete an option by mistake, simply add it back in again!

-
Select ✓ Save Changes
"Bulk" Add a List of Options
To add a longer list of "Select" Field options:
-
Pick Select → for the Field Type
-
Enter a Field Name → ex. Department
-
Click Bulk add
-
Paste your list of options inside the entry box
-
Select Add Options
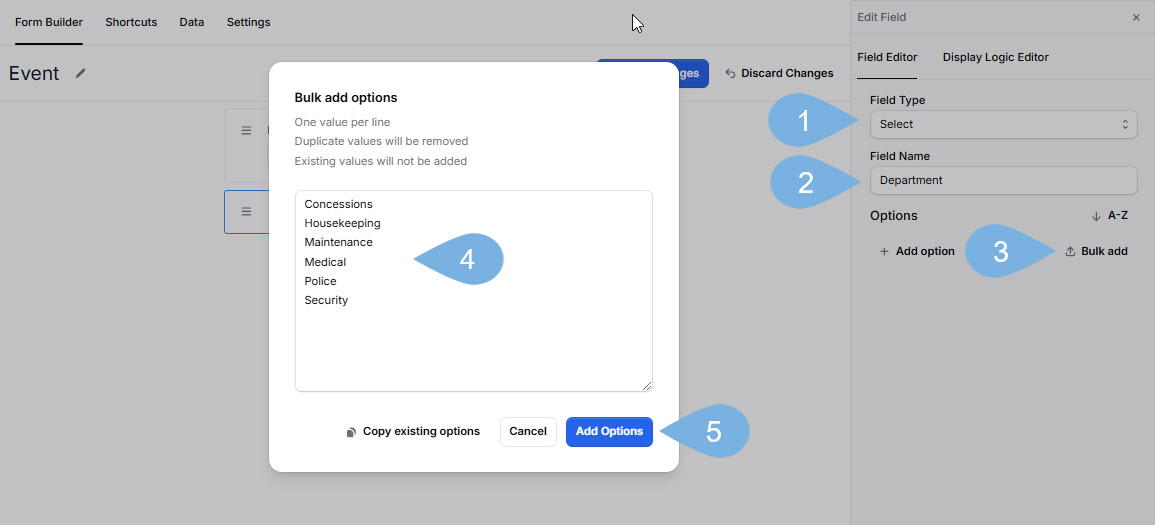
-
Voila! Click your lists → and click ✓ Save Changes! (Don't forget!)
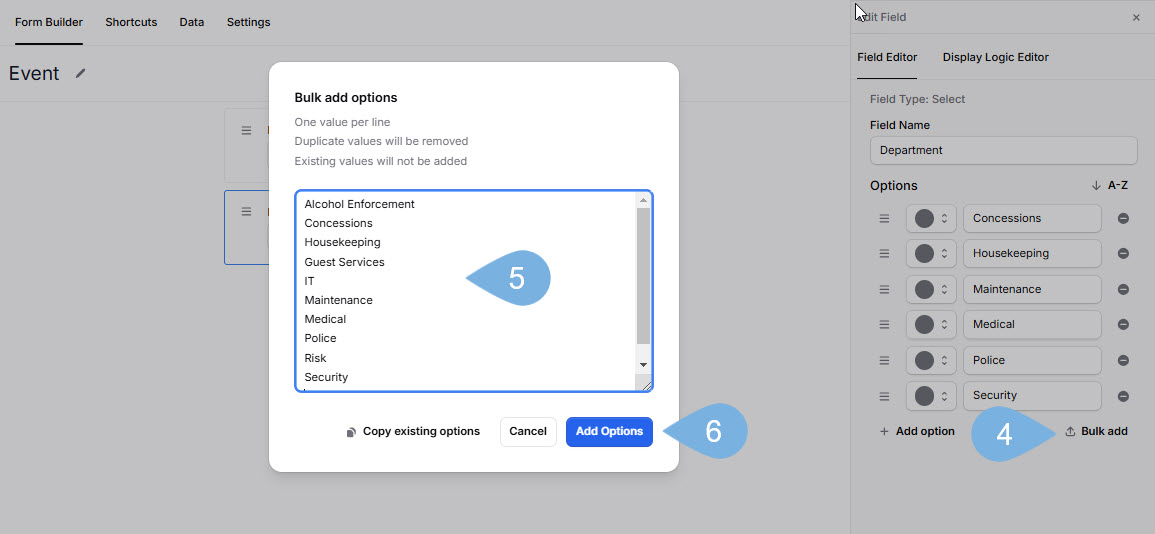
"Bulk" update a sizable list of changes
If you have a longer list of updates, use the Bulk editing tool once again.
- Duplicates will be eliminated automatically
To update longer list of "Select" options
-
Click Forms from the Navigation panel
-
Open your target Form → ex. Event
-
Click the editing Pencil in the corner of any "Select" Field → ex. Department

-
Click Bulk add
-
Paste your updated list of options inside the entry box
-
Select Add Options
-
Alphabetize the new list if necessary → by clicking A-Z
-
Cick ✓ Save Changes! (Don't forget!)
Delete a Select Field From a Form
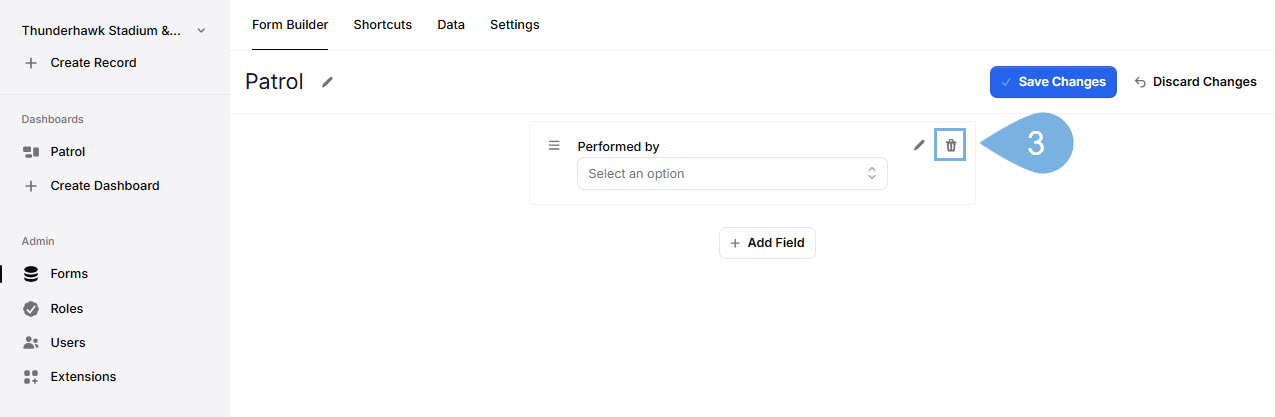
To delete a Select Field altogether:
-
Click Forms from the Navigation panel
-
Open your target Form → ex. a Patrol Form
-
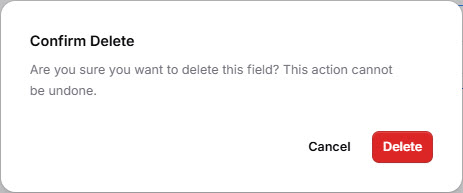
Click the Trash icon
-
Select Delete to confirm your decision
-
You must click ✓ Save Changes to finalize the deletion!
- If you change your mind, click Discard Changes
