6. Invite New Users
About Users & Roles
As you invite Users, you'll also assign Roles:
-
Roles → give Users the permission to perform their Role-based activities
-
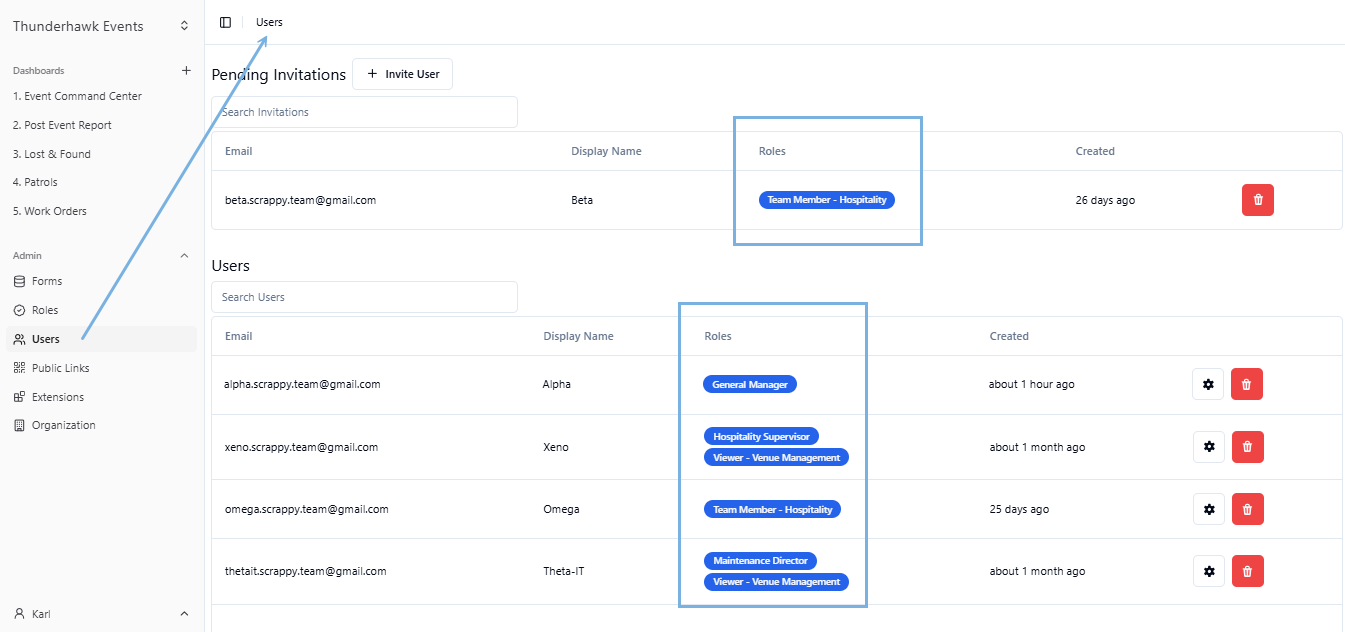
Users → can only access relevant Records → For example:
- Security Team Records can be shielded from the Hospitality Team
- Risk Reports can be assigned on a need-to-know basis
- Maintenance Issues can be directed to the Maintenance team, with completed work shared broadly
-
Users may be assigned multiple Roles
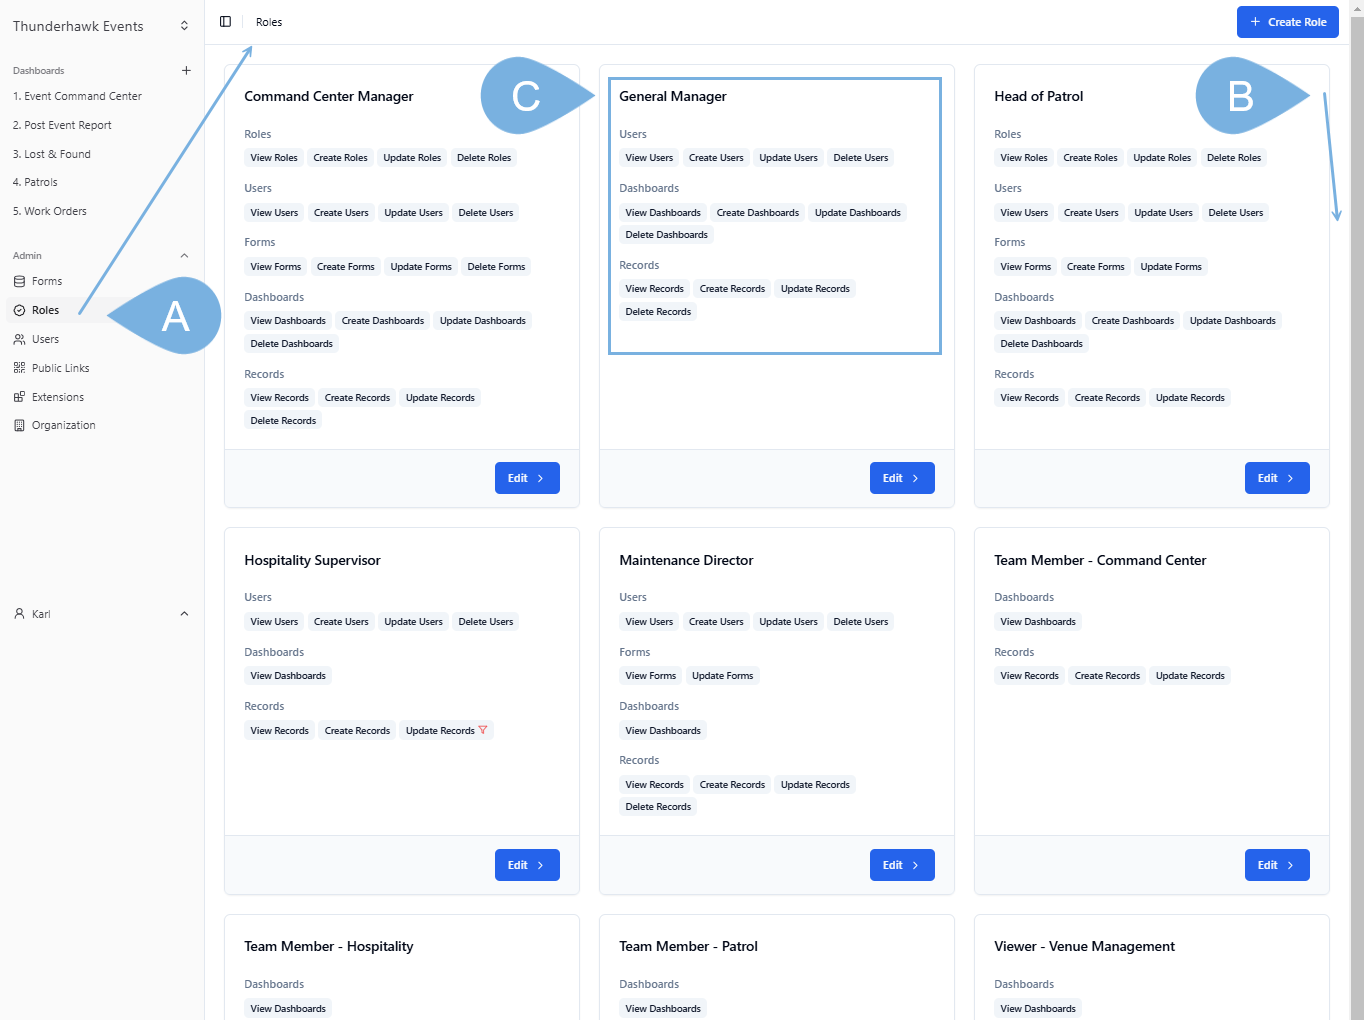
- Before inviting new Users, get familiar with the existing Roles defined by your Organization:
- A. Click Roles from the Navigation bar
- B. Scroll down to view all of your existing Roles
- C. Review the permissions on each Role Card
Invite New Users
To create a new User:
-
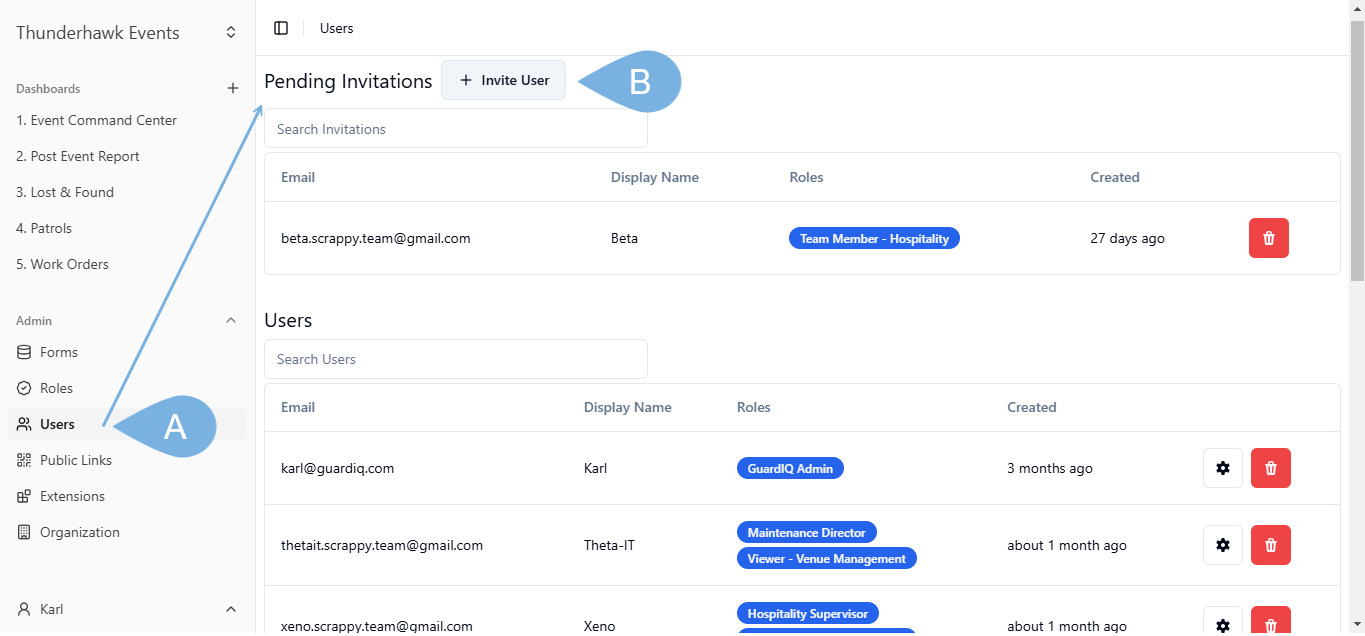
Select Users
-
Click Invite User
-
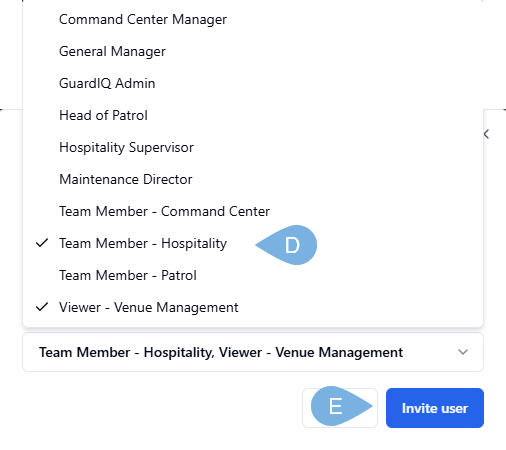
In the Invite User box:
A. Enter the new User's Email address
B. Provide a Display Name → ex. a first name
C. Pick the down arrow → to open the Roles drop-down list
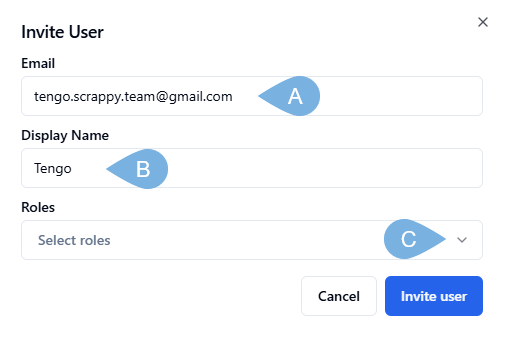
D. Select one or more Roles
E. Click Invite User
- For a detailed guide, see Invite Users & Set Roles
-
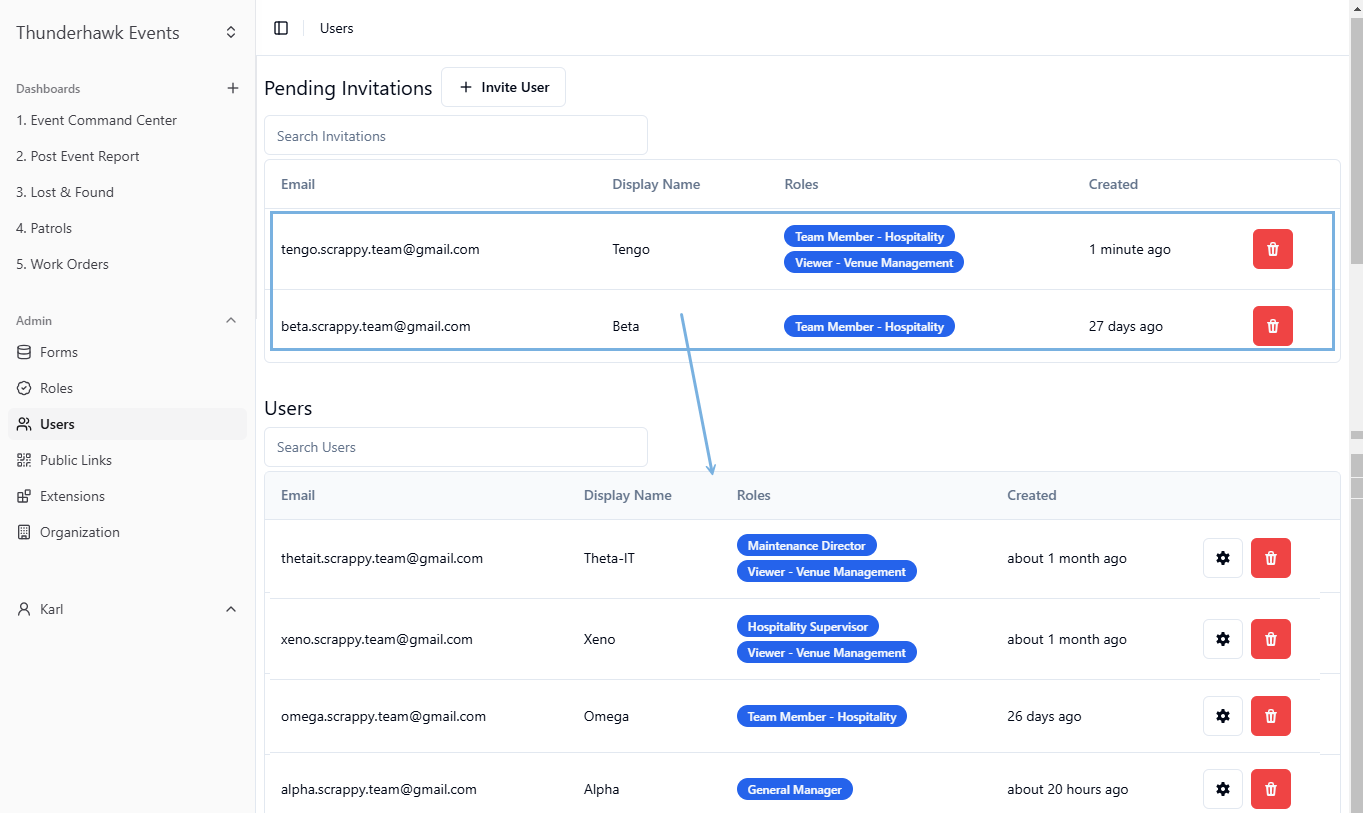
New Users will first appear in your "Pending Invitations" list
- Registration is required
- Instructions are found in this Quickstart guide → Register & Login
- Visit docs.guardiq.com for more Quickstart guides
-
After registration, invitees will pop into your Users list.
Update User Roles
Roles allow you to restrict User access to specific teams.
To update a User's Role definition:
-
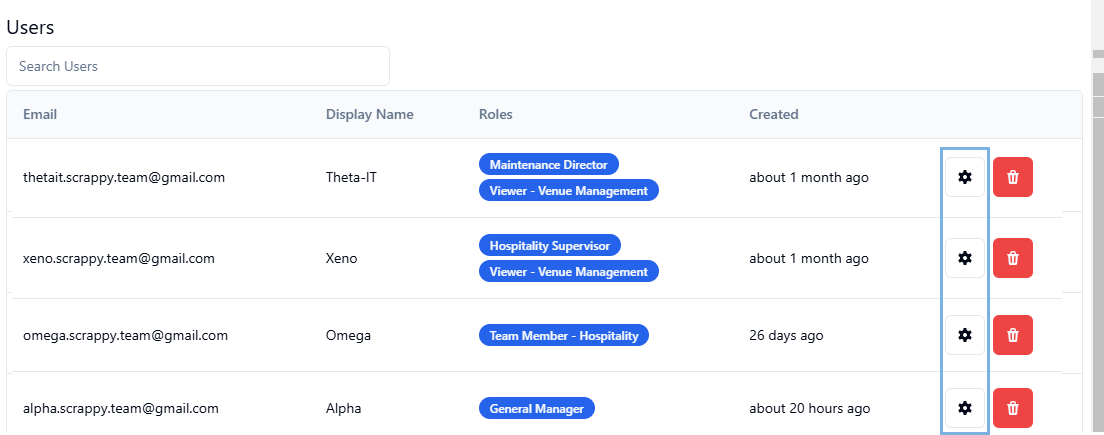
Click the Gear icon → seen next to a User's name
-
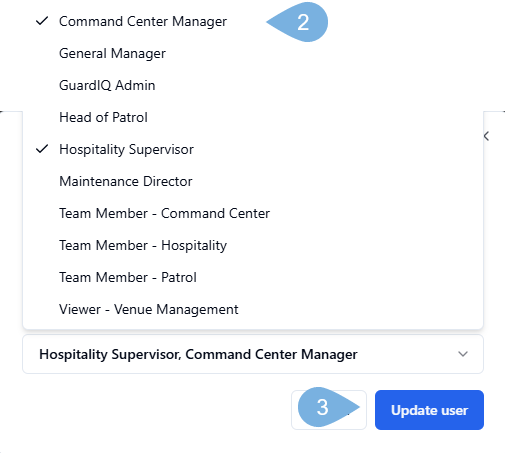
In the Update User box → check or uncheck Roles from the drop-down list
- Click to add new Roles
- Users can have multiple roles
- Remove a Role by unchecking it
-
Select Update User
Delete Users
To delete a user from your Organization:
-
Open the Users page
-
Click the red Trash icon next to a name

- Select Remove User
