Public Links
Quickstart
How to Build a Public Link
Here, we'll shorthand the creation of a Public Link.
- For more detail, link to the deep dive sections below
- Currently, for security reasons →
- Only the Guard IQ Implementation Team can create Public Links
- So contact us! We'll be happy to help
To build a Public Link that connects patrons to a Wheelchair Request Shortcut Form:
-
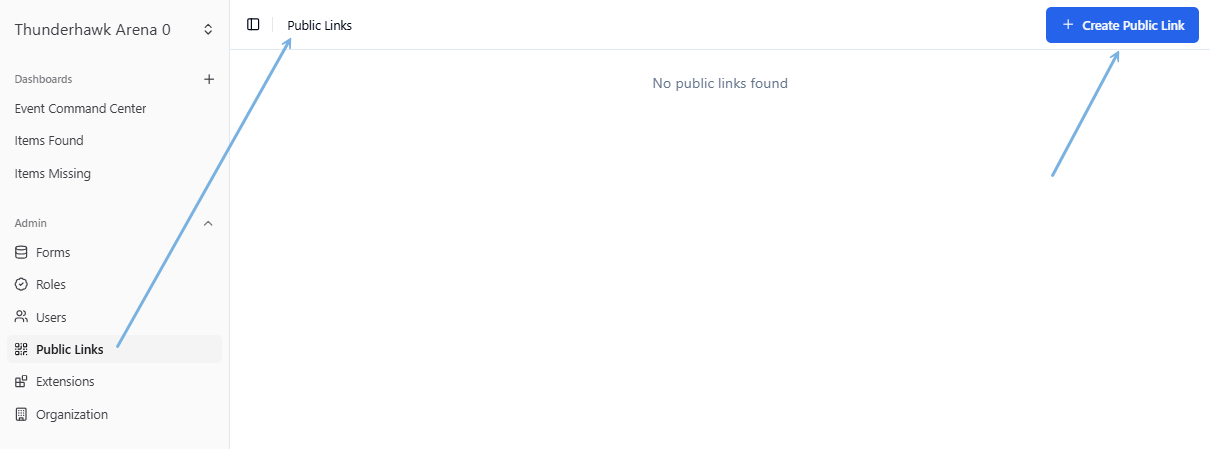
Open the Admin section → and click Public Links
-
Click + Create Public Link
-
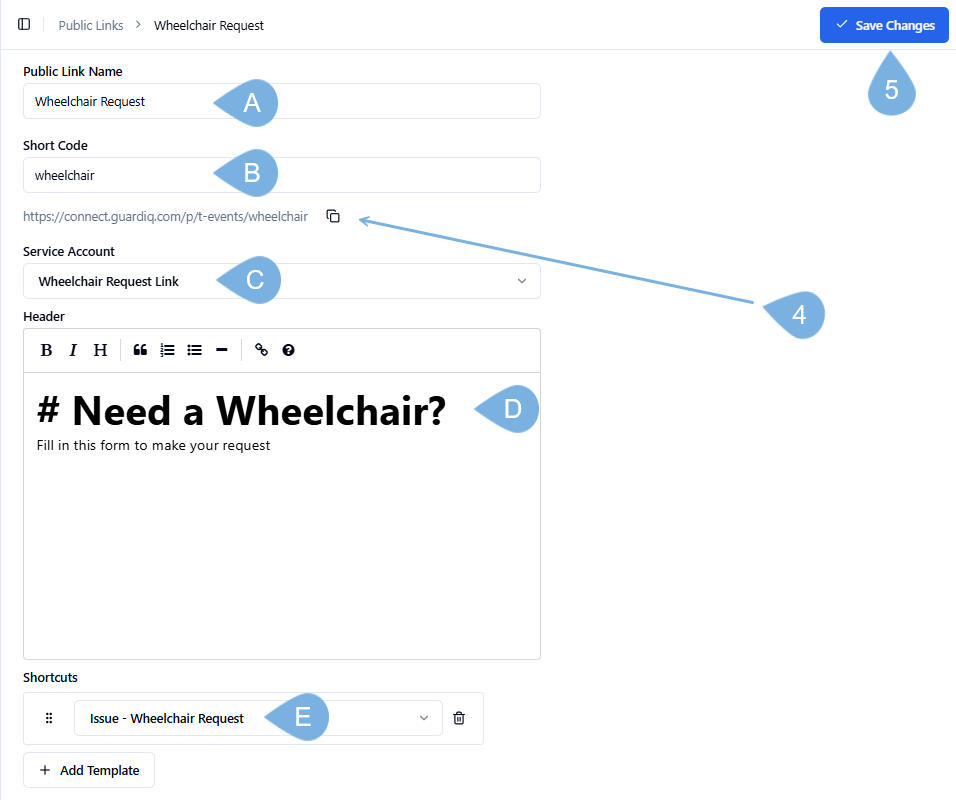
Enter your:
-
A. Public Link Name → ex. Wheelchair Request
-
B. Short Code → ex. wheelchair
-
C. Service Account → ex. 'Wheelchair Request Link'
-
D. Header → ex. 'Need a Wheelchair? Fill in this form to make your request'
-
E. Shortcut Form(s) → ex. Issue - Wheelchair Request
-
-
Copy the link by clicking the Icon marked above
-
Click ✓ Save Changes
-
Use the link or create a QR code and test your Public Links

- Click Public Links from the Navigation Bar
- Select the Copy icon from the Shortcut's card
All About Public Links
Anonymous Public Links launch Shortcut versions of Forms which can deploy down multiple distribution channels → ex. SMS, QR codes, NFC, social media, and more.

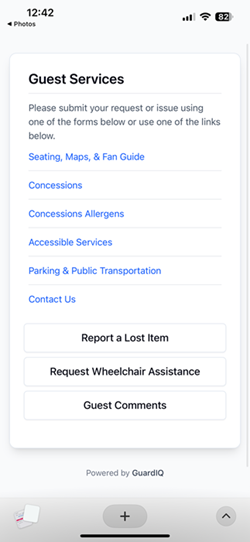
For example, a QR Code can launch the below mobile Form to patrons in an 80,000 seat stadium. And, it's all managed by Guest services. It includes:
- General Venue Information
- 3 Shortcut Forms
- 'Report a Lost Item'
- Request Wheelchair Assistance
- Guest Comments
- Public links require a high level of security →
- They need to locked down so they act exactly as you stipulate
- For this reason, only the Guard IQ team can create Service Accounts
- Contact your Guard IQ Account Rep, and the Services Team will set you up with as many Service Accounts as you need
There are five things you need to do:
-
A. Enter a Public Link Name → ex. Wheelchair Request
-
B. Type in a Short Code → ex. wheelchair
-
C. Create a restricted Role, aka, Service Account → ex. 'Wheelchair Request Link'
-
D. Design your Header → ex. 'Need a Wheelchair? Fill in this form to make your request'
-
E. Link to your Shortcut Form(s) → ex. Issue - Wheelchair Request
A. Public Link Name → Suggestions
Keep your audience in mind when naming your Public Links. Clear, simple, and short is best. For example:
- Wheelchair Request
- Report an Incident
- Guest Services
B. Short Code → Invent your URLs Endpoint
Short Codes are lowercase endpoint codes tacked on to URLs, such as:
- /wheelchair → for Wheelchair Request
- /incident or /report or /rpt → for Report an Incident
- /guest-services or /guest-serv → for the Guest Services
C. Service Account → Pick or Create a restricted Role
Public Links utilize Service Accounts to control access and permissions through Role-based descriptions.
Service Accounts act like signage with security present — guiding patrons to their seats and ensuring wildings don't jump the turnstiles into the VIP Club Level without proper credentials.

To limit the actions of a Public Link with a Role-based Service Account:
-
Start by clicking Role → followed by + Create Role
-
Enter a Role Name
-
Restrict the Service Account → ex. set Records access to just View & Create
- Don't give any other access → ex. not to Dashboards or Admin features
-
Click the Gear icons to restrict access further →

-
→ Pick Show All Records → and Done
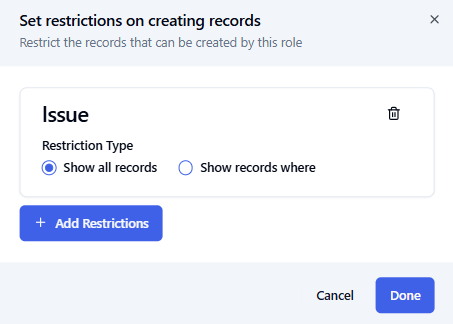
- Under Data Settings on the Roles page

- In the Role's tile

D. Header → Write and Format your Message
Use the simple text editor to craft your message to your audience. Use every element, including Headings, spacers, and URLs to inform. For example, this Header . . .
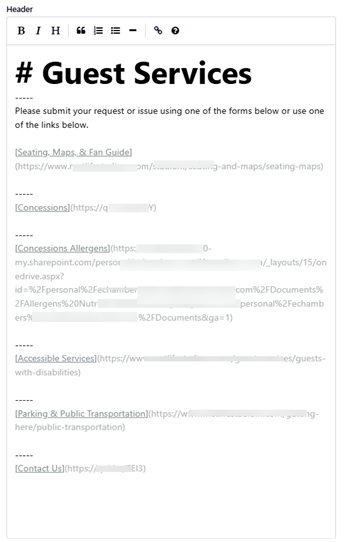
. . . produced this result for a major venue. Links went out to venue maps and other Website-based information and details.
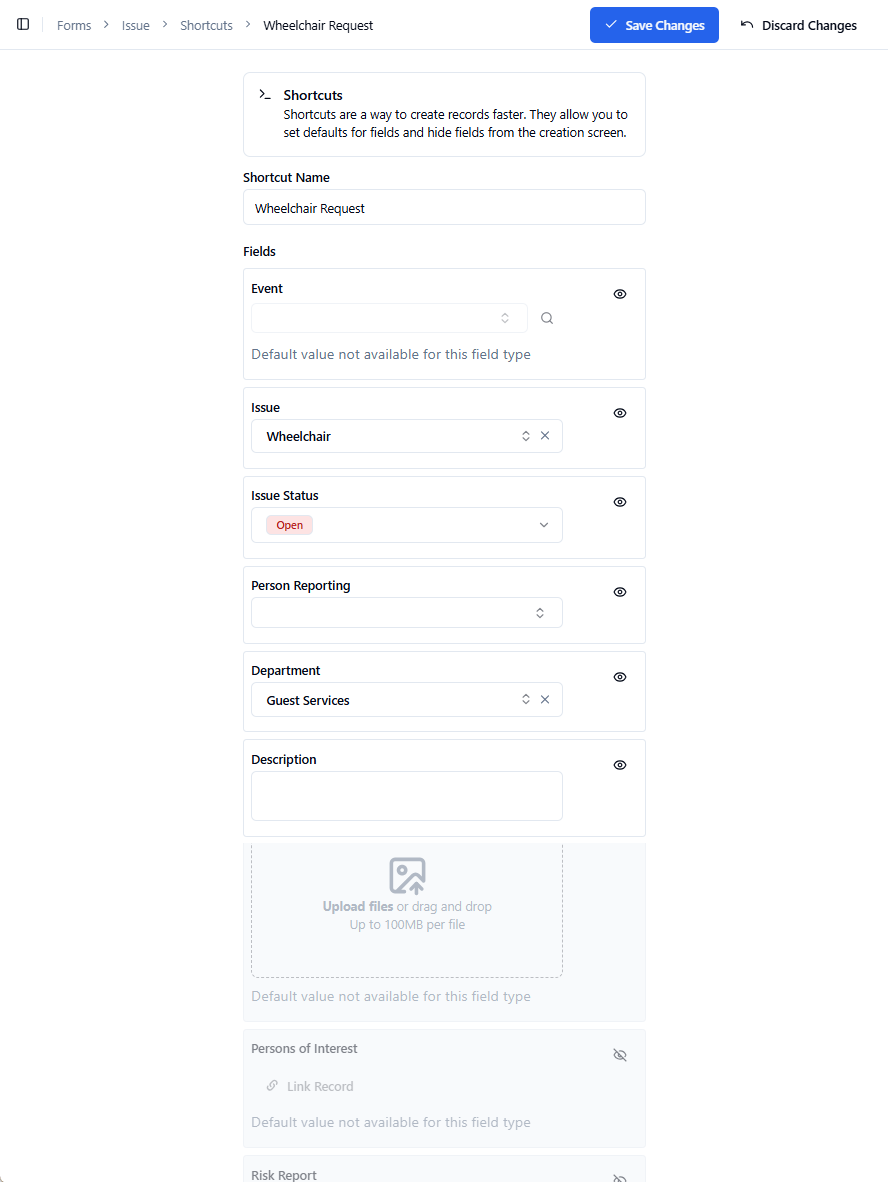
E. Shortcut → Create & Pick
Have you created a Shortcut for your Public Link?
Learn all about creating Shortcuts for your Forms in our Shortcuts article. Here's an example of a possible Shortcut that will work well for a Public Link. Notice that at the bottom of the Form, certain Fields have been removed from view for anonymous Public Link patrons.
Test a Public Link & QR Code
Go ahead. Give your URL spin!
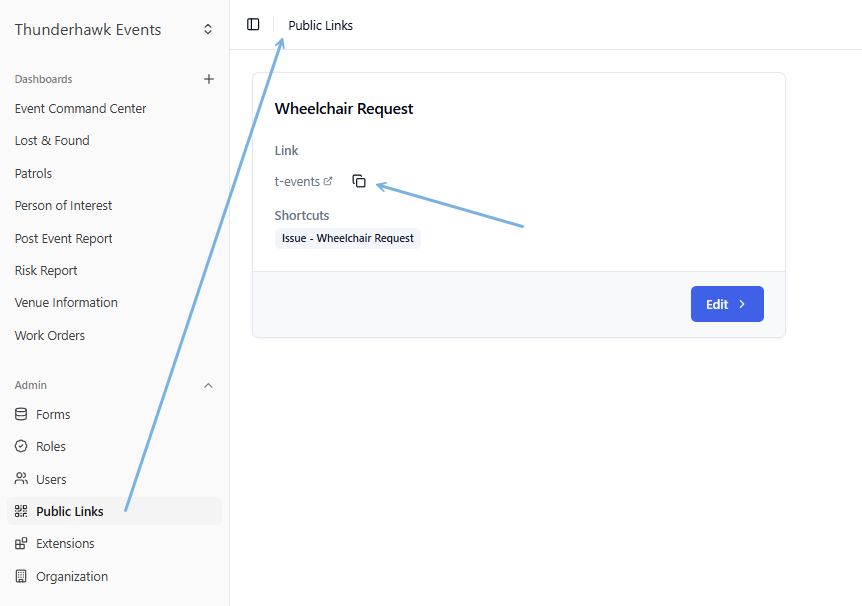
To Copy your Public Link:
-
Click Public Links from the Navigation Bar
-
Select the Copy icon from the Shortcut's card

-
Copy your link into a browser!
Generate a QR Code
Use a QR Code creator to convert your Public Link's URL into a printable QR code.
-
For example, you can try Adobe's free QR Code generator at:
Try this code for our Wheelchair Request link!