→ Add Locations, Issues & People to Forms
About Adding new Locations, Issues, People & Departments
If you need to add Locations, Issues, People, or anything else to a Form's drop-down list, you're in the right place.
And while we are always happy to help, it's not difficult, so you may wish to take care of it yourself! Don't worry if you get it wrong, we can always set it right!
- Select Fields allow choices from predefined lists – like picking a Location, People, Department or an Issue from a drop-down
-
The nice part?
-
If you can update one drop-down list, you can update them all!
-
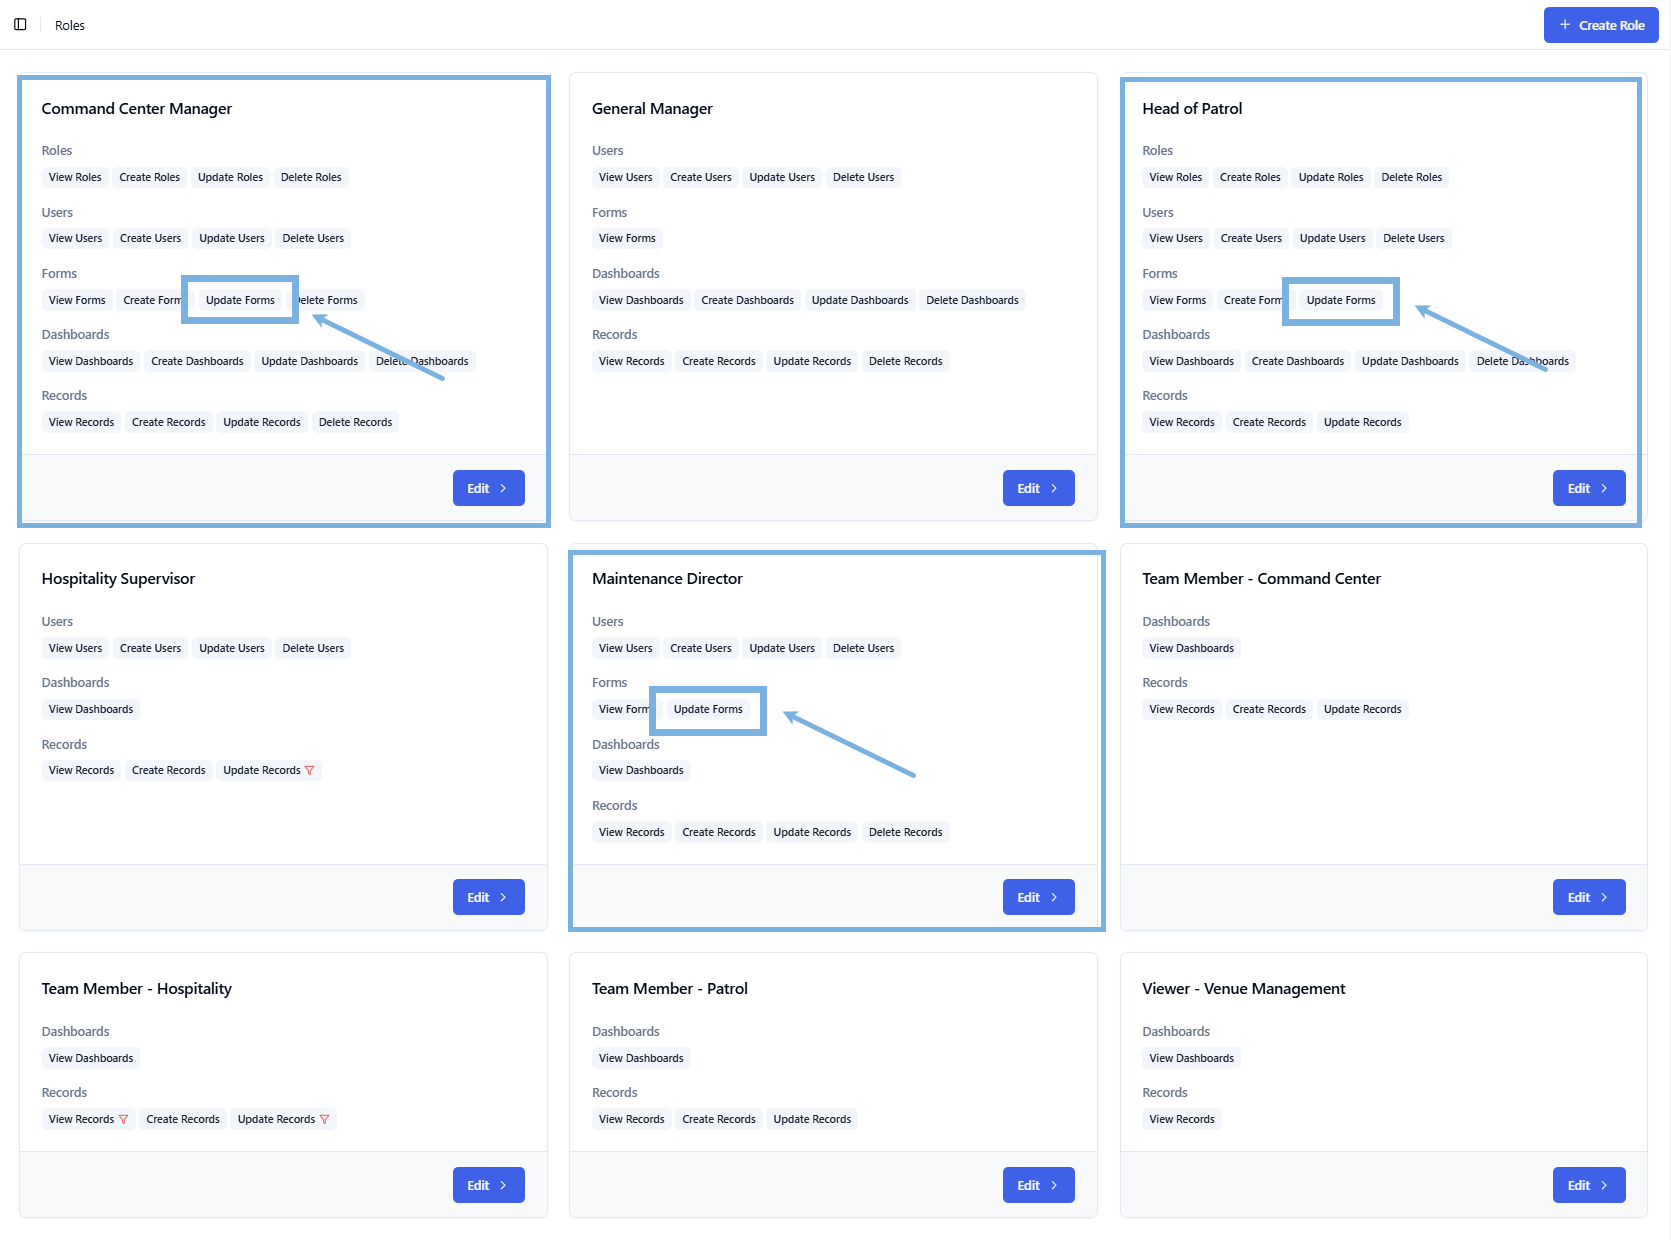
Do you have the Role-based permission to add things?
As you were invited to Guard IQ, you were also assigned a User Role.
- Roles → limit a User's access to their specific activities in Guard IQ
To add Locations you must have Leader-level access, and have the Update Forms permission turned on. At Thunderhawk Events, this permission has only been given to specific Supervisors — like the Command Center Manger, Maintenance Director, and Head of Patrol.
Every venue will make different choices. (See About Users & Roles)
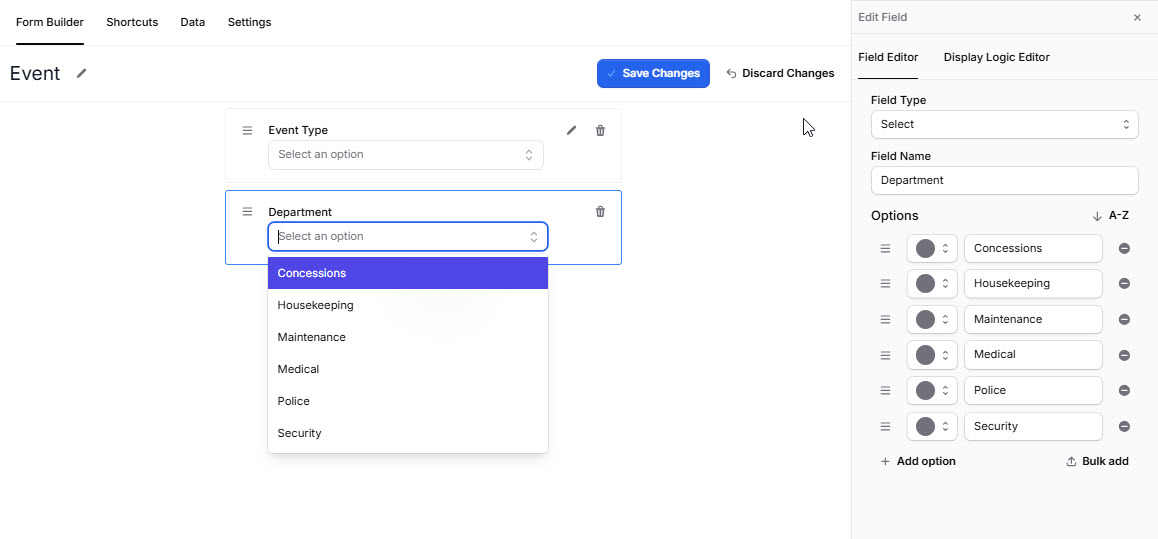
Update a List of Options
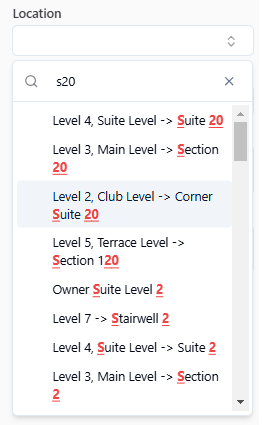
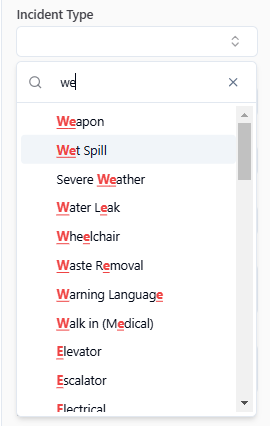
To update a Select Field's options → ex. Names:
-
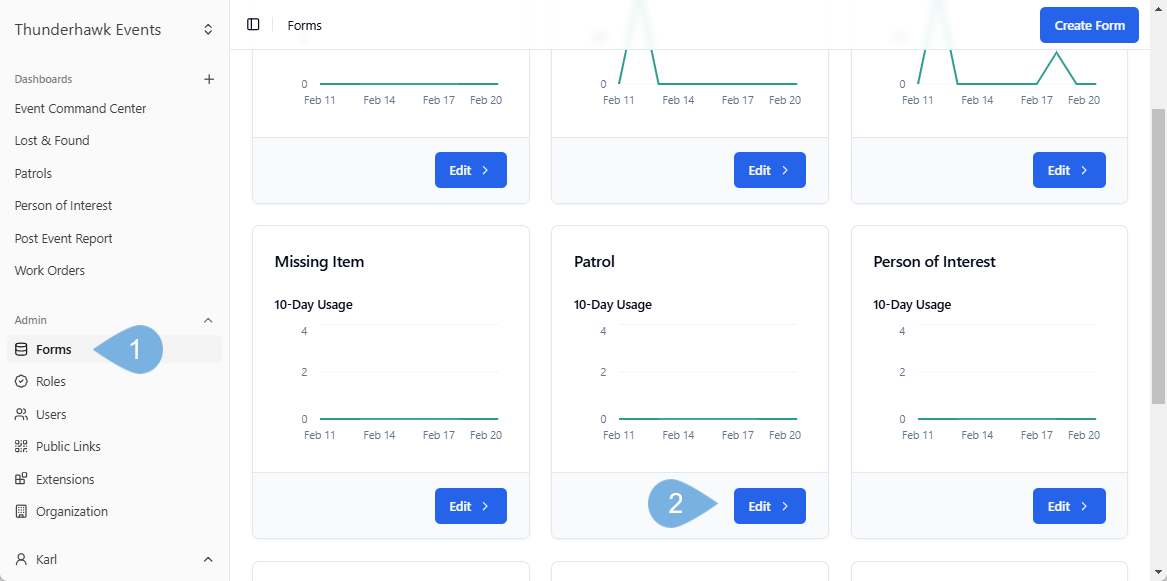
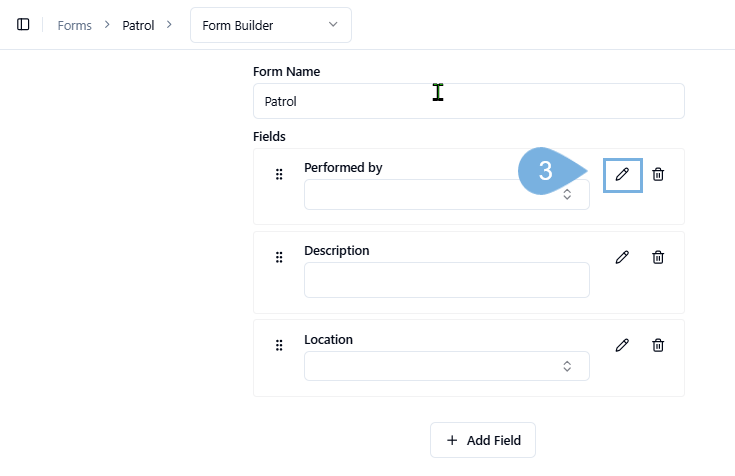
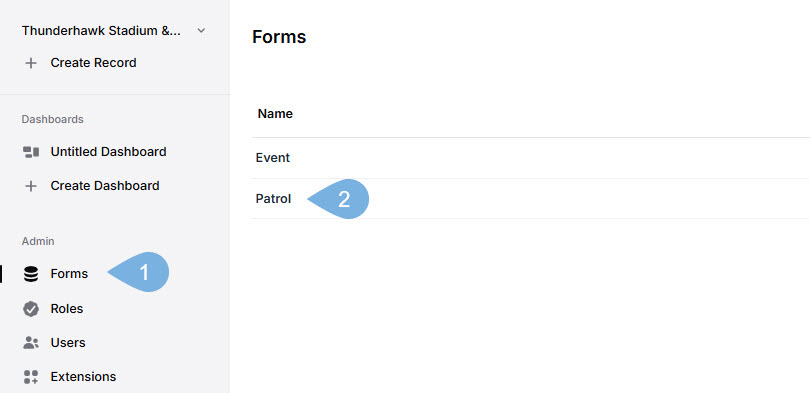
Click Forms from the Navigation panel
-
Open your target Form → ex. Patrol
-
Click the editing Pencil in the corner of any "Select" Field → ex. Performed By
-
See:
Add options to a drop-down list
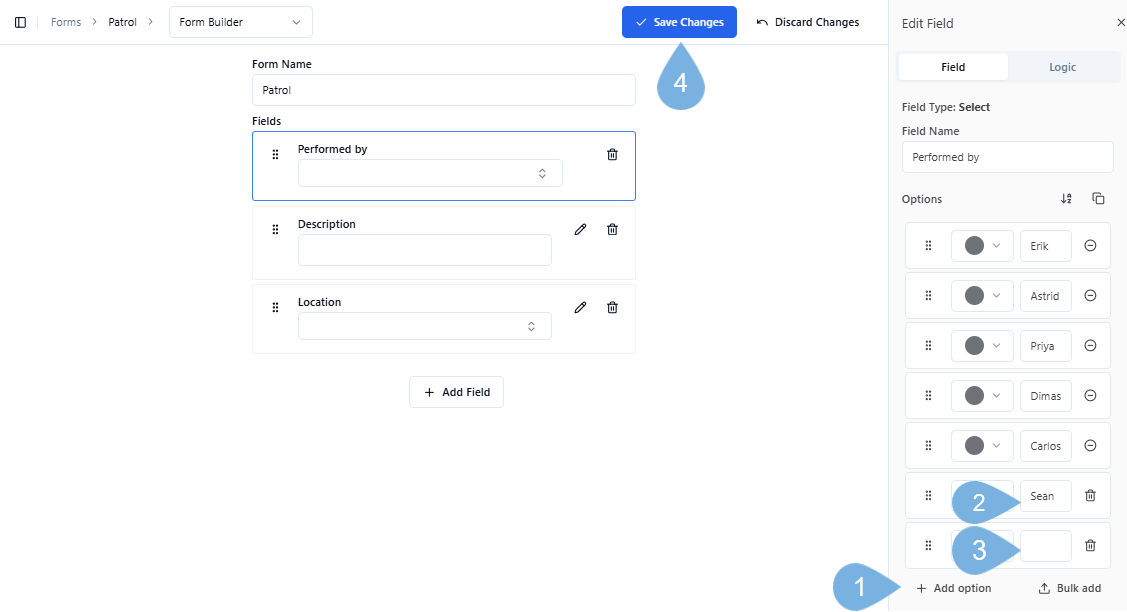
To add names (or options) to a drop-down list:
-
Tap the + icon
-
Enter a new name → ex. Sean
-
Press Enter → or click the + icon to add more items to the list
-
Select Save Changes
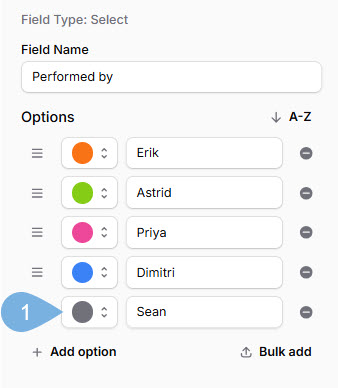
Correct spelling mistakes
-
Click any of the Options in your list
-
Fix the spelling → ex. Dimas to Dimitri
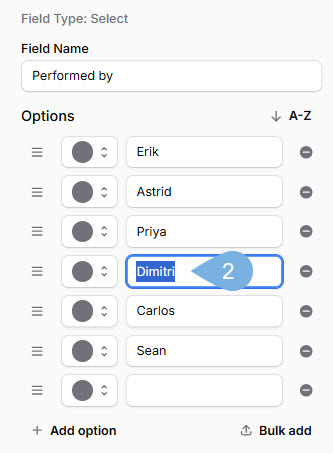
- Note: Blank fields, as seen above, will be ignored
-
Select Save Changes
Color coding options, lists & widgets
When you apply colors to a Select list, you’ll see the corresponding colors pop up in your Dashboard widgets. The colors can help you spot things a bit more quickly!
Pick your colors from the color palette.
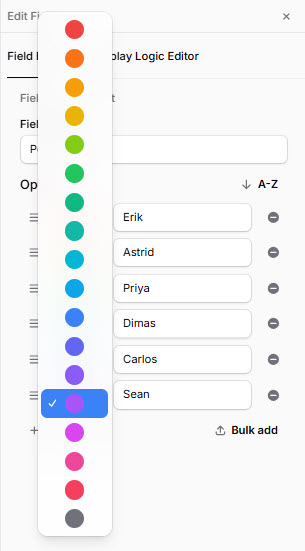
To add a splash of color:
-
Click the grey circle → and pick a color
-
Select Save Changes
Alphabetize a drop-down list
To add a splash of color:
-
Click the A-Z button
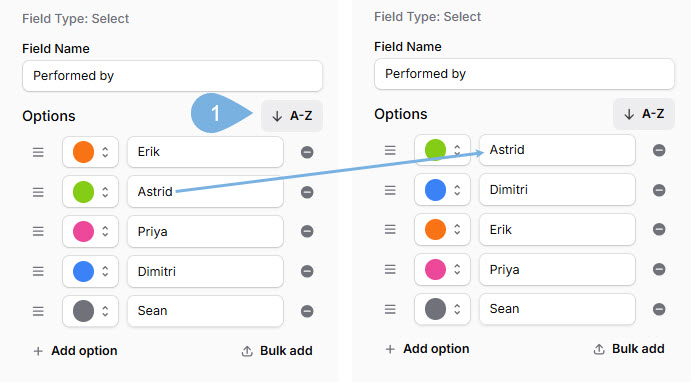
-
Select Save Changes
Reorder a list
In this example, say Sean is a team leader and will be selected the most often To reorder a list → ex. to display in alphabetical order:
- Click and drag the Hamburger icons up or down
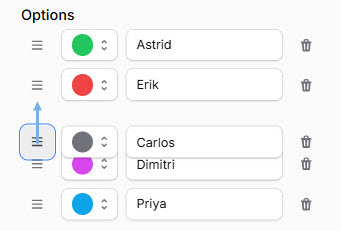
- Select Save Changes
Delete drop-down list items
To delete, and later restore, an option:
-
Click the - Delete icon to the right of any items you wish to remove → ex. Carlos
- If you delete an option by mistake, simply add it back in again!

-
Select Save Changes
"Bulk" Add a List of Options
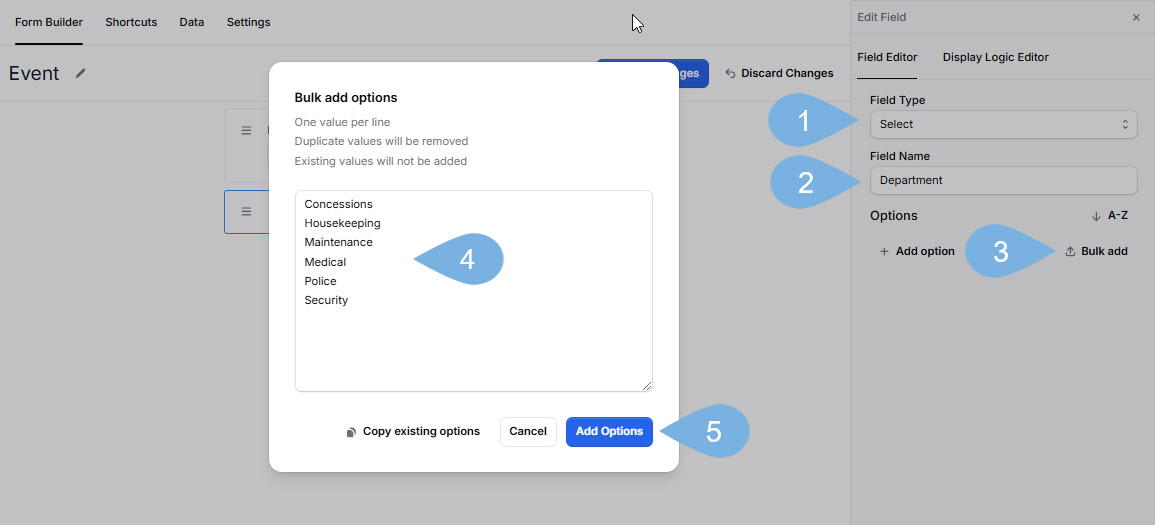
To add a longer list of "Select" Field options:
-
Pick Select → for the Fild Type
-
Enter a Field Name → ex. Department
-
Click Bulk add
-
Paste your list of options inside the entry box
-
Select Add Options
-
Voila! Click your lists → and cick Save Changes! (Don't forget!)
"Bulk" update a sizable list of changes
If you have a longer list of updates, use the Bulk editing tool once again.
- Duplicates will be eliminated automatically
To update longer list of "Select" options
-
Click Forms from the Navigation panel
-
Open your target Form → ex. Event
-
Click the editing Pencil in the corner of any "Select" Field → ex. Department

-
Click Bulk add
-
Paste your updated list of options inside the entry box
-
Select Add Options
-
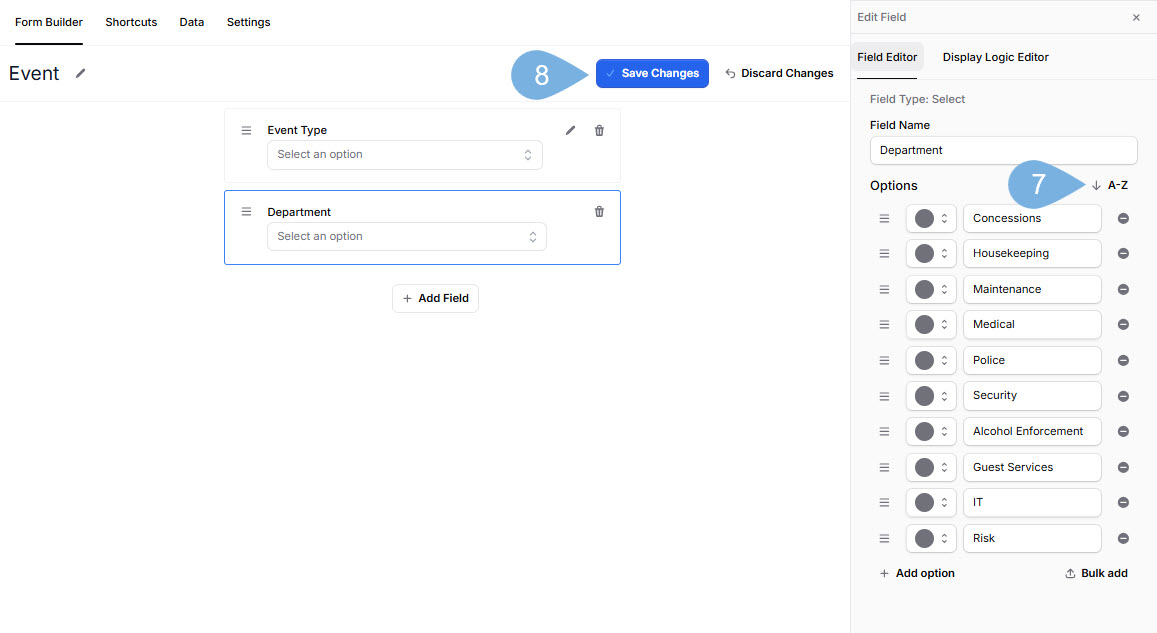
Alphabetize the new list if necessary → by clicking A-Z
-
Cick Save Changes! (Don't forget!)
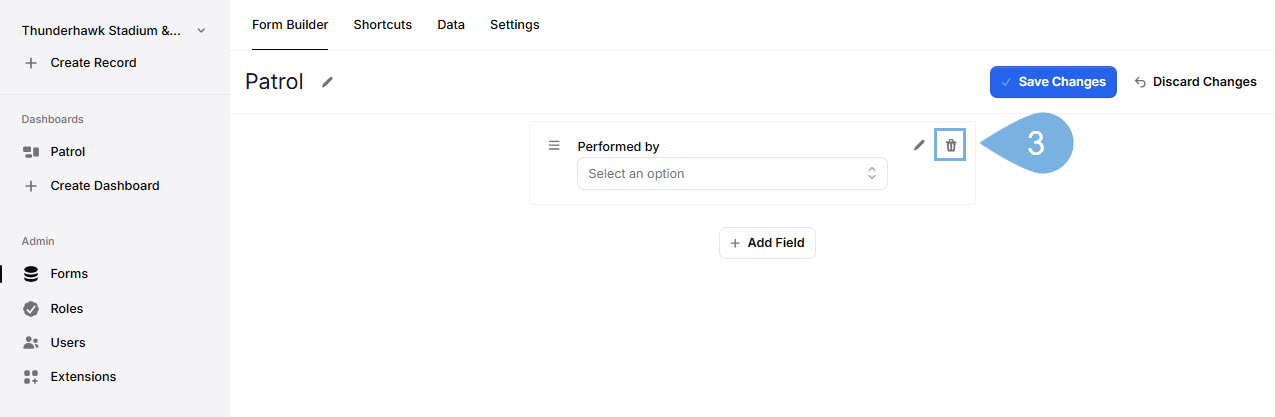
Delete a Select Field From a Form
To delete a Select Field altogether:
-
Click Forms from the Navigation panel
-
Open your target Form → ex. a Patrol Form
-
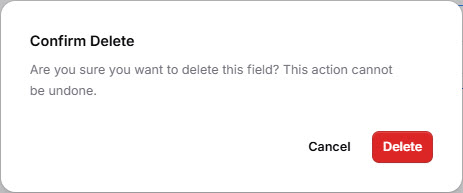
Click the Trash icon
-
Select Delete to confirm your decision
-
You must click Save Changes to finalize the deletion!
- If you change your mind, click Discard Changes
